Using the Python API
The Python API is a set of functions and methods that allows developers to interact with Python applications and libraries. These APIs are used to perform a wide range of tasks, such as retrieving data, sending commands, and integrating with other systems.
Python APIs are typically implemented as modules or packages that can be imported into Python code. Once an API is imported, developers can use the functions and methods provided by the API to interact with the application or library.
Some examples of popular Python APIs that will be available in the Code Lab:
Requests: A library for making HTTP requests
NumPy: A library for scientific computing
Pandas: A library for data analysis and manipulation
Scikit-learn: A library for machine learning
GDAL: A library which is a set of Python bindings for the GDAL geospatial data abstraction library. GDAL is a translator library for raster and vector geospatial data formats.
To use a Python API, developers typically need to:
Install the API module or package. This is optional if the list of packages needed to the user is already available in the default installation.
Import the API into their Python code and/or notebooks.
Use the functions and methods provided by the API to interact with the application or library.
Default list of packages
You can retrieve the list of pre-installed packages by:
Opening a Terminal,
Typing the command conda list.
Python and package update policy
The Python version and the pre-installed packages come from the notebook image, which is maintained by the service team. They are updated according to the following policy.
The pre-installed packages and libraries are reviewed and updated approximately every four months.
The default Python version is reviewed and updated approximately once a year.
Both timelines depend on the release management of Insula Code, so an update may be delivered later than the nominal cadence.
New versions are added by rebuilding the notebook image and delivering it with an Insula Code release. Once released, they apply to the default kernel the next time you start your server; a server that is already running keeps the previous image until it is restarted.
The image provides a single default Python version. When a new one is introduced, the previous one is no longer available in the image, and packages that are not compatible with the supported Python version are dropped. A virtual environment created against a Python version that is no longer provided has to be recreated, because it references the interpreter of the image it was built with.
For this reason, do not rely on the default kernel to keep a fixed set of package versions. Create your own virtual environment instead (see Install new packages), which persists across server restarts and lets you control the versions you depend on (see Going Deep: Ensuring Reproducible Results).
Install new packages
Conda vs virtualenv
The notebook image is built with Conda as its package manager, along with the packages shipped for that technology. Conda is baked into the read-only image, so the conda CLI and the other Conda tools are available from a Terminal. We do not recommend creating new environments with Conda, however: because the image is read-only, a Conda environment is not persisted and is lost when your server restarts.
To install your own packages, or different versions of packages already present in the image, create a Python virtual environment (virtualenv) instead. These environments persist because they live under /home/jovyan (see Going Deep: Ensuring Reproducible Results). To use a virtualenv from a notebook, and not only from a Terminal, you also register a kernel that points to it with ipykernel, as shown below.
The following steps create and manage an environment, install an arbitrary package, and make it available to a notebook. The environment will be named my_env, but you can use any other name you prefer.
Create a new environment
python -m venv /home/jovyan/my_env
If you also want access to the platform’s pre-installed packages from within the environment, add the –system-site-packages flag. Omit it to start from a clean environment.
python -m venv /home/jovyan/my_env --system-site-packages
Activate it
source /home/jovyan/my_env/bin/activate
Install a new package
Install ipykernel together with your package so the environment can register its own notebook kernel. Always invoke pip as python -m pip, so packages install into the active environment.
python -m pip install ipykernel dvc # dvc is an arbitrary package in this example.
If you install a package while a notebook is already running on that environment’s kernel, restart the kernel before you can import and use the new package. A running kernel does not pick up packages added after it started.
Enable the environment for usage in a notebook’s kernel
Type:
python -m ipykernel install --user --name=my_env
Refresh the browser.
Register the kernel with python -m ipykernel, not ipython kernel install. The latter may register the Conda ipython instead of the environment’s Python: the package would be installed into my_env, while the notebook kernel would still start with /opt/conda/bin/python, so the environment is ignored and import raises a ModuleNotFoundError. Using python -m ipykernel binds the kernel to the environment’s interpreter and avoids this mismatch.
Test the environment
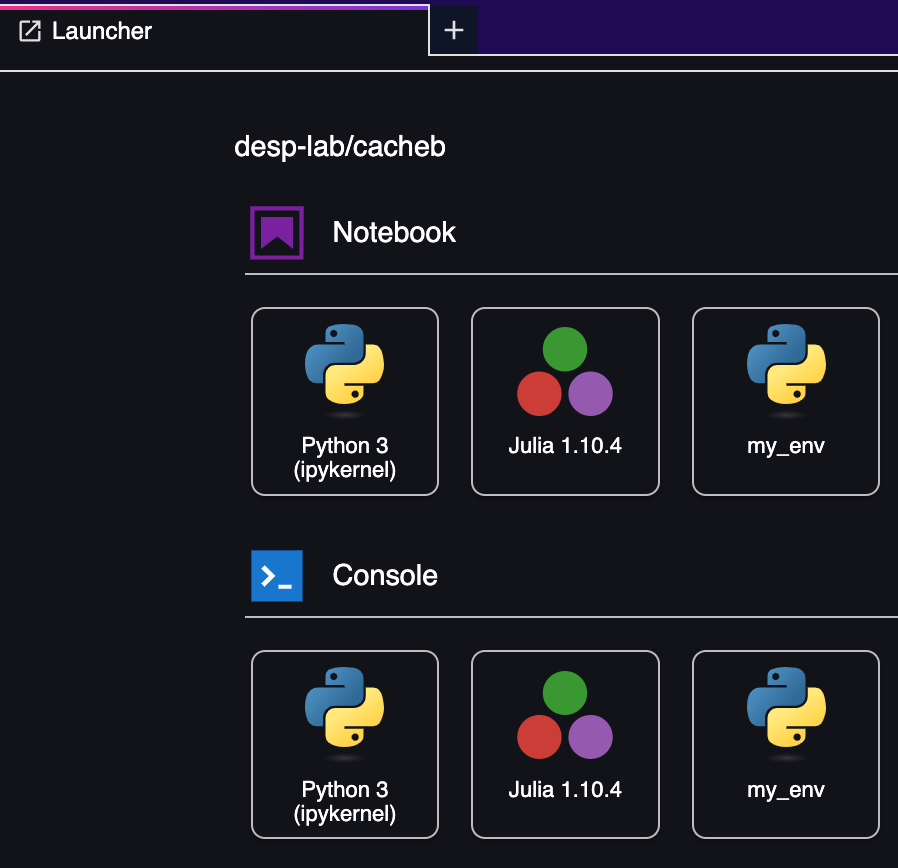
The steps above result in a new entry in the GUI called my_env:
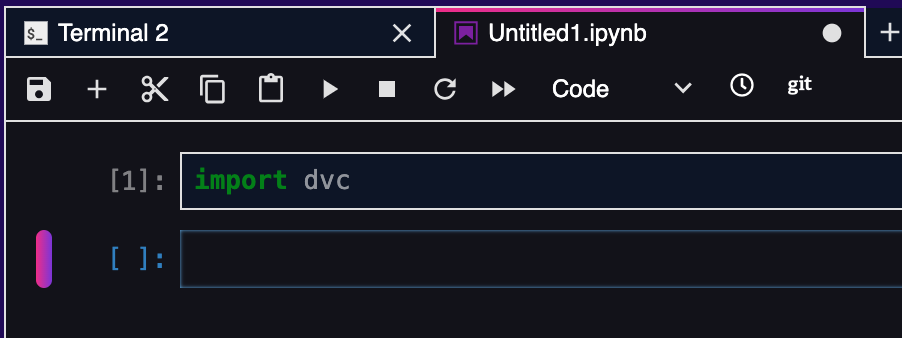
In which it is possible to import the newly installed module:
Delete the environment
In the case the environment is no longer necessary, it is sufficient to follow the steps below.
Type:
rm -rf /home/jovyan/my_env
jupyter kernelspec uninstall my_env
When requested, type y
Going Deep: Ensuring Reproducible Results
On the Insula Code, a virtual environment created under /home/jovyan is persisted across server restarts, while packages installed into the base image are not. Keeping your dependencies inside an environment is therefore the reliable way to retain them between sessions.
A dedicated Python environment is also essential for achieving reproducible results with your Python notebooks. Here’s how it helps:
Isolated Dependencies: An environment allows you to manage the specific versions of libraries and packages required for your notebook. This prevents conflicts with other projects or system-wide installations that might have different dependencies.
Repeatability Across Systems: By capturing the exact set of packages and their versions within the environment, you can ensure your notebook executes consistently, regardless of the machine or environment it’s run on. This is crucial for sharing notebooks with colleagues or replicating your work later.
Consider this scenario:
Without an environment, you might have several versions of libraries installed on your system. If your notebook relies on a specific version of a library (e.g., pandas==1.4.1), running it on another machine with a different version (e.g., pandas==1.5.0) could lead to unexpected behavior or errors.
Using a Python environment solves this issue by guaranteeing a consistent set of dependencies for your notebook, promoting reliable and reproducible results.