Geospatial Data Access Platform User Manual
This manual provides step-by-step instructions for accessing, searching, and downloading geospatial data using the platform interface. Follow the guide below to understand each feature and function of the platform.
Getting Started
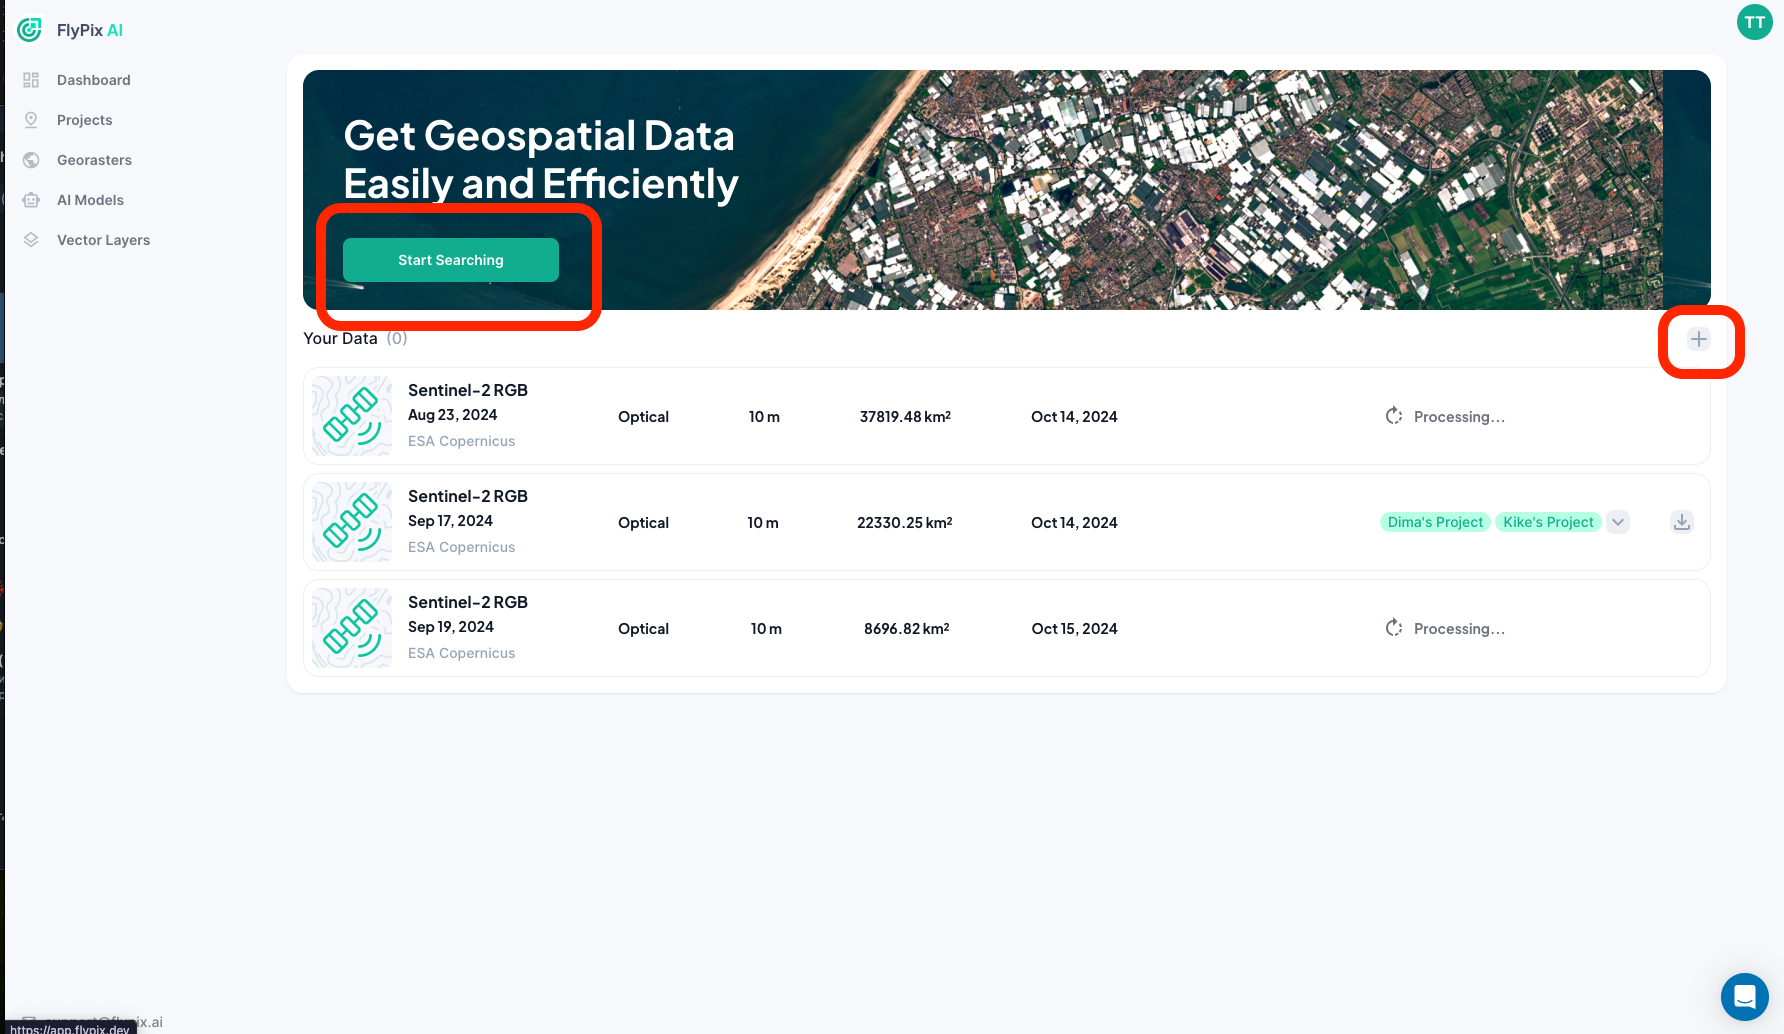
To begin accessing geospatial data, navigate to the dashboard and locate the Start Searching button on the homepage.

Start Searching: Click the green button labeled Start Searching to initiate a search for geospatial data. This will take you to the map interface where you can define a region of interest for your data search.
Selecting a Region
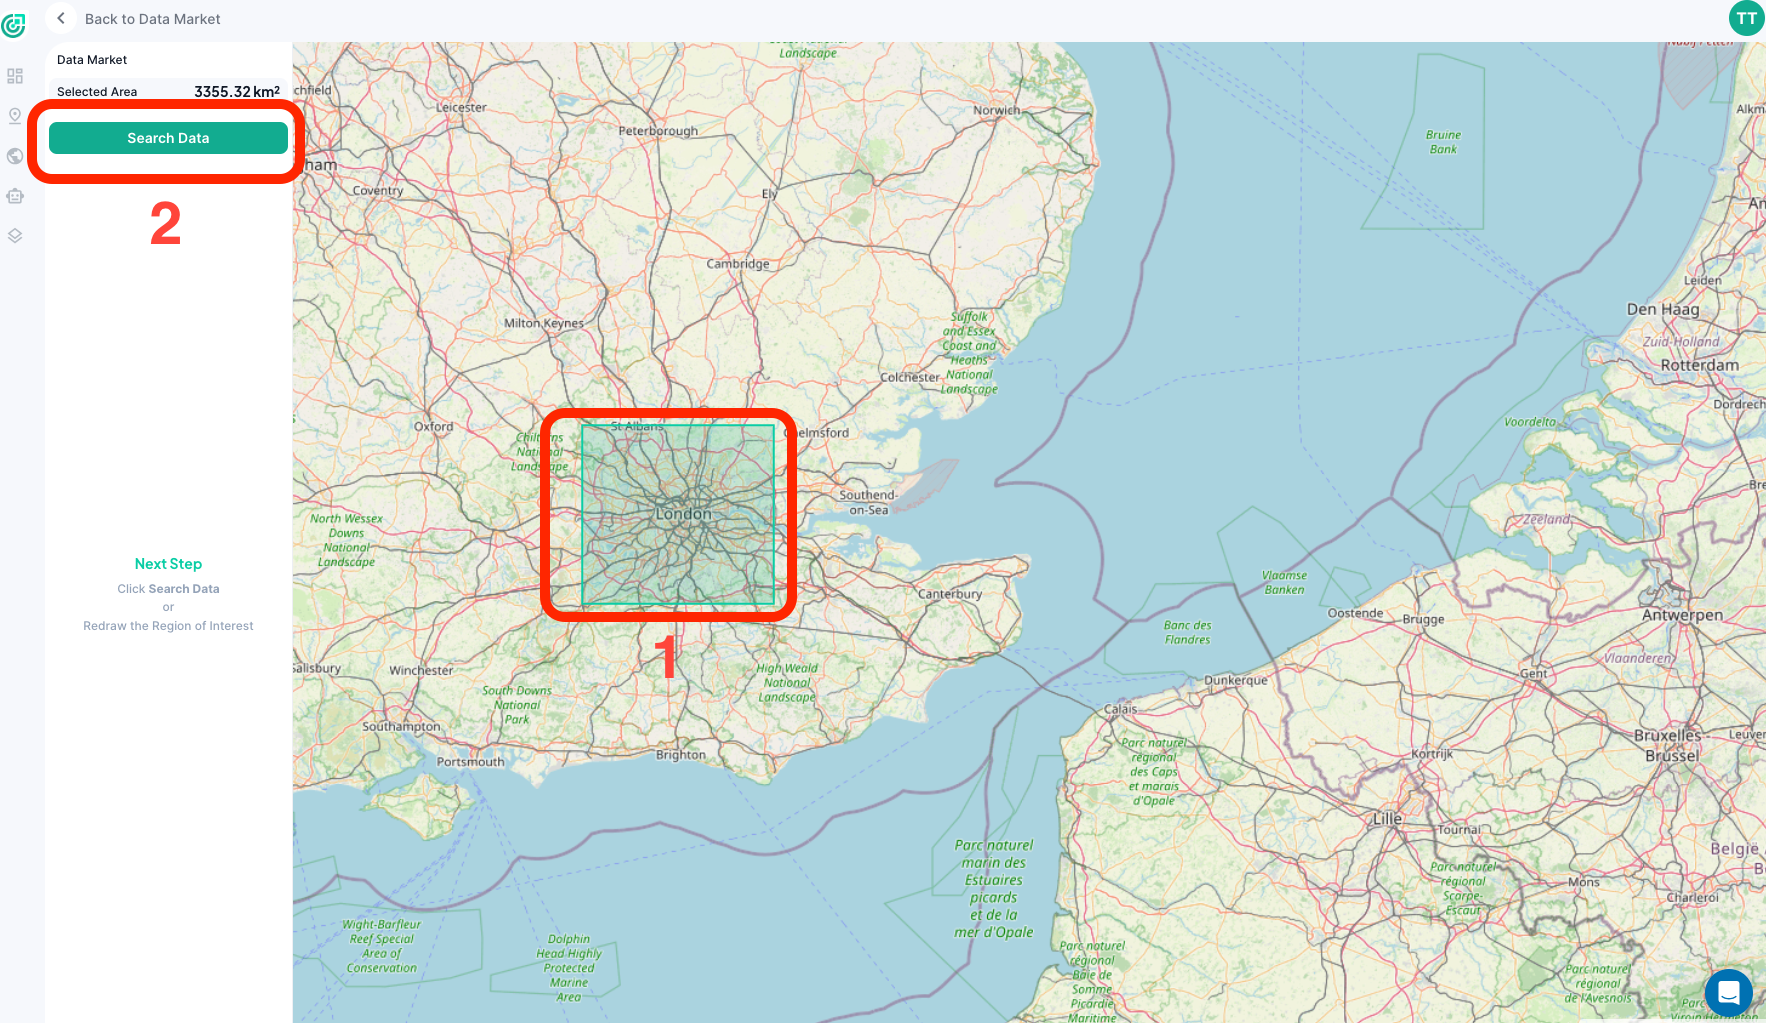
Once you click Start Searching, you will be directed to a map interface where you can select a region for which you want to access satellite data.

Select Region of Interest (ROI): Use your mouse to draw a region on the map. The selected area will be highlighted on the map.
Search Data: After selecting your desired region, click the Search Data button to retrieve the available datasets for that area.
Selected Area: The selected region will display the area (in km²) in the top left of the screen.
Next Step: To proceed, either redraw the region or confirm your selection by clicking Search Data.
Acquiring Data from Available Options
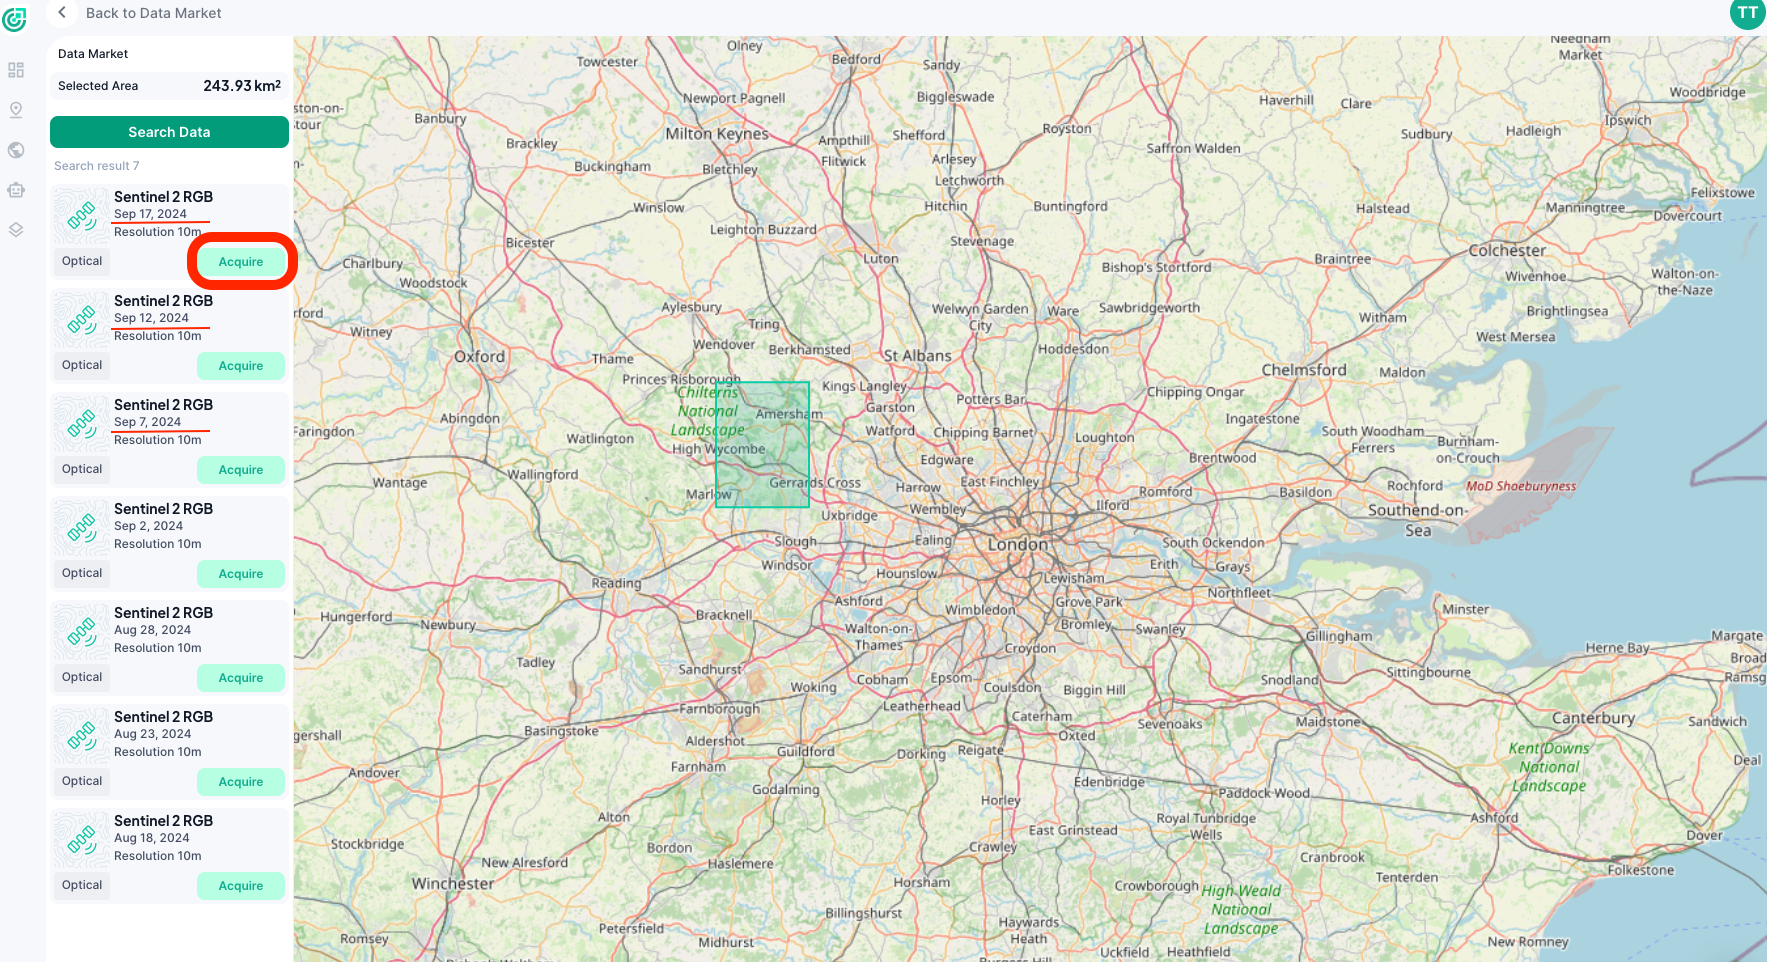
After searching for data, the platform will display a list of available datasets that cover your selected region.

View Available Data: The platform will show multiple Sentinel-2 RGB datasets, each with details such as:
Acquisition Date
Type: (e.g., Optical)
Resolution (e.g., 10m)
Coverage Area (in km²)
Acquire Data: Click the Acquire button next to the dataset you want to select. You can review each dataset by hovering over the listed entries to see more information or selecting directly from the map.
Linking Data to Projects or Downloading
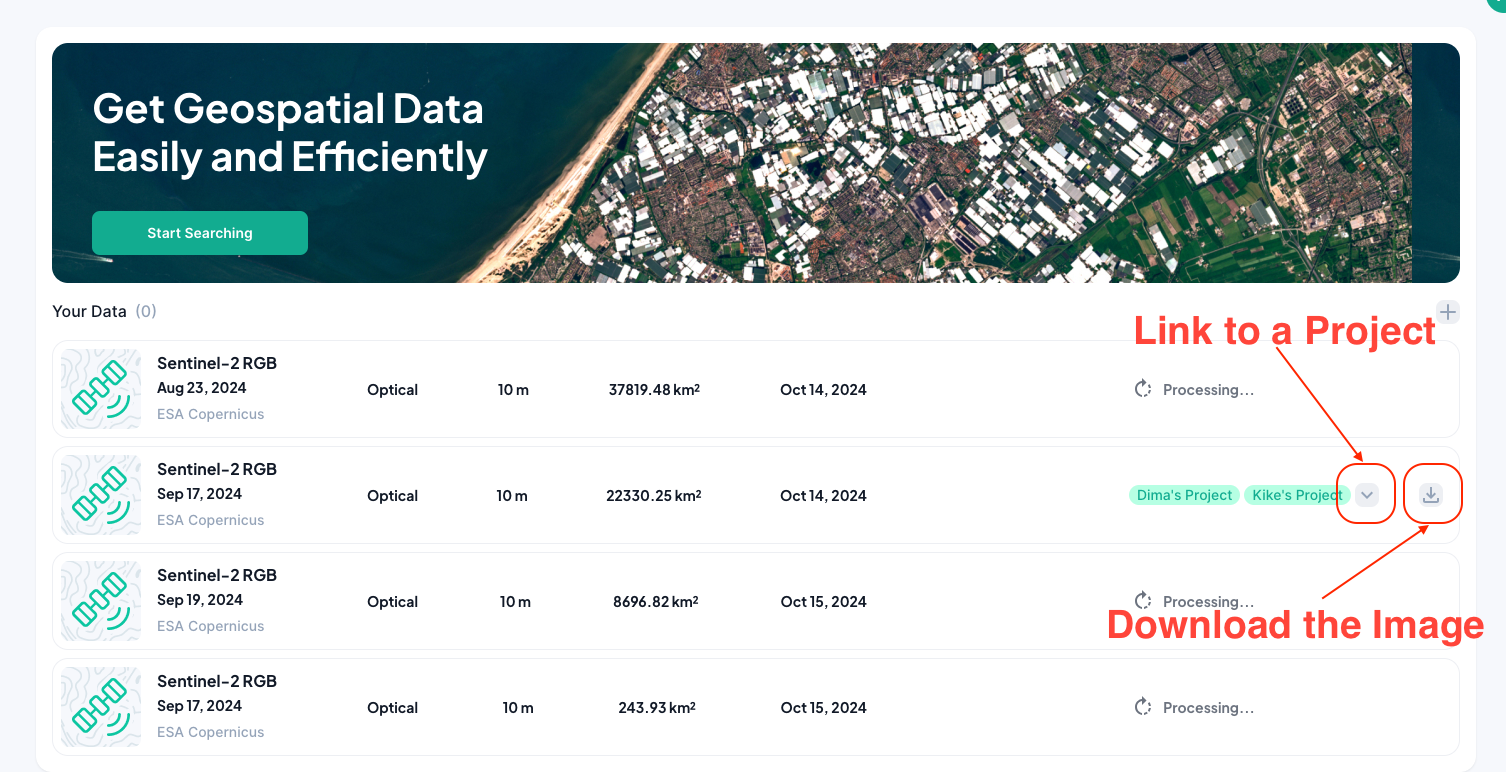
Once you have selected and processed the dataset, you can either download the data or link it to a project.

Link to a Project: You can link the dataset to one or more existing projects by clicking the dropdown menu next to each data entry. Example project names such as Project Name may appear, allowing you to assign the data to ongoing work.
Download Data: To download the selected dataset, click the download icon next to the project link button. This will save the data to your local machine for further analysis.
Processing Status: Some datasets may display a “Processing” status. Once the processing is complete, you can proceed with linking or downloading the data.
Conclusion
This platform offers a user-friendly interface for acquiring high-quality geospatial data quickly and efficiently. By following the steps above, users can search for data, acquire the needed datasets, and integrate them into their projects seamlessly.
In case of questions contact the support team.