GeoAI User Manual
Introduction
This guide will help you understand the GeoAI user flow to get started with your geospatial AI projects.
Step-by-Step User Guide
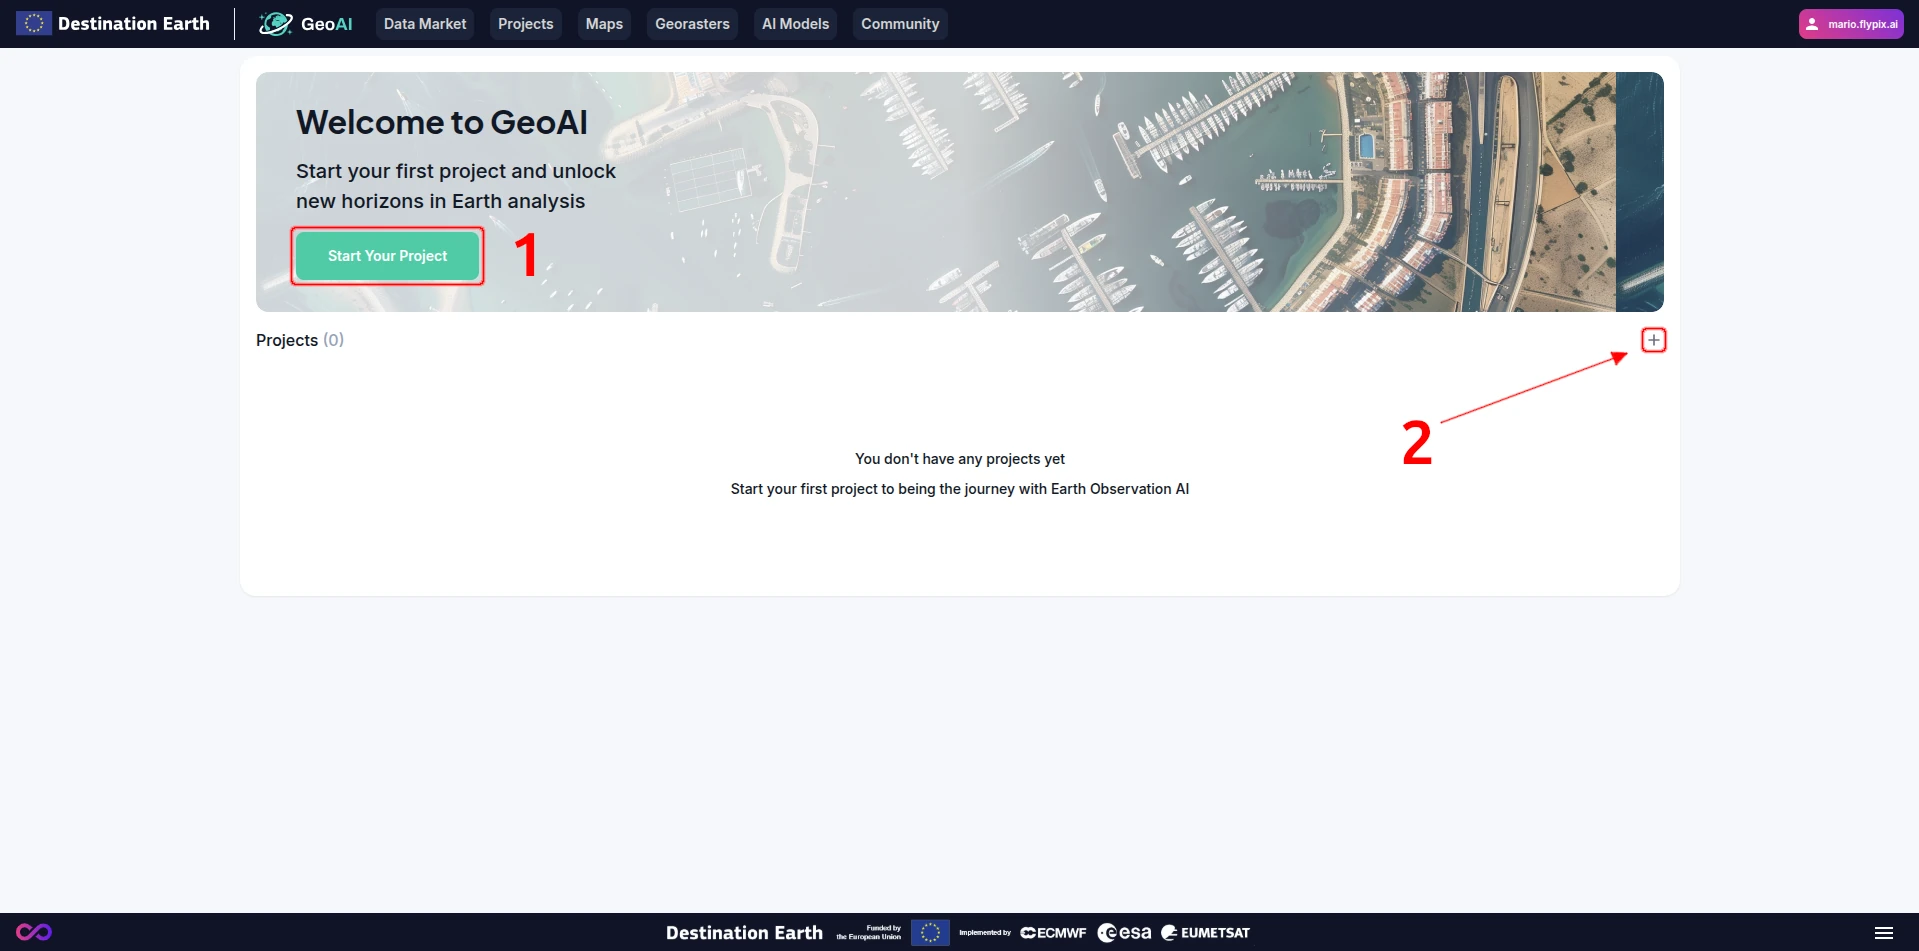
Step 1: Start Your Project
Create a New Project:
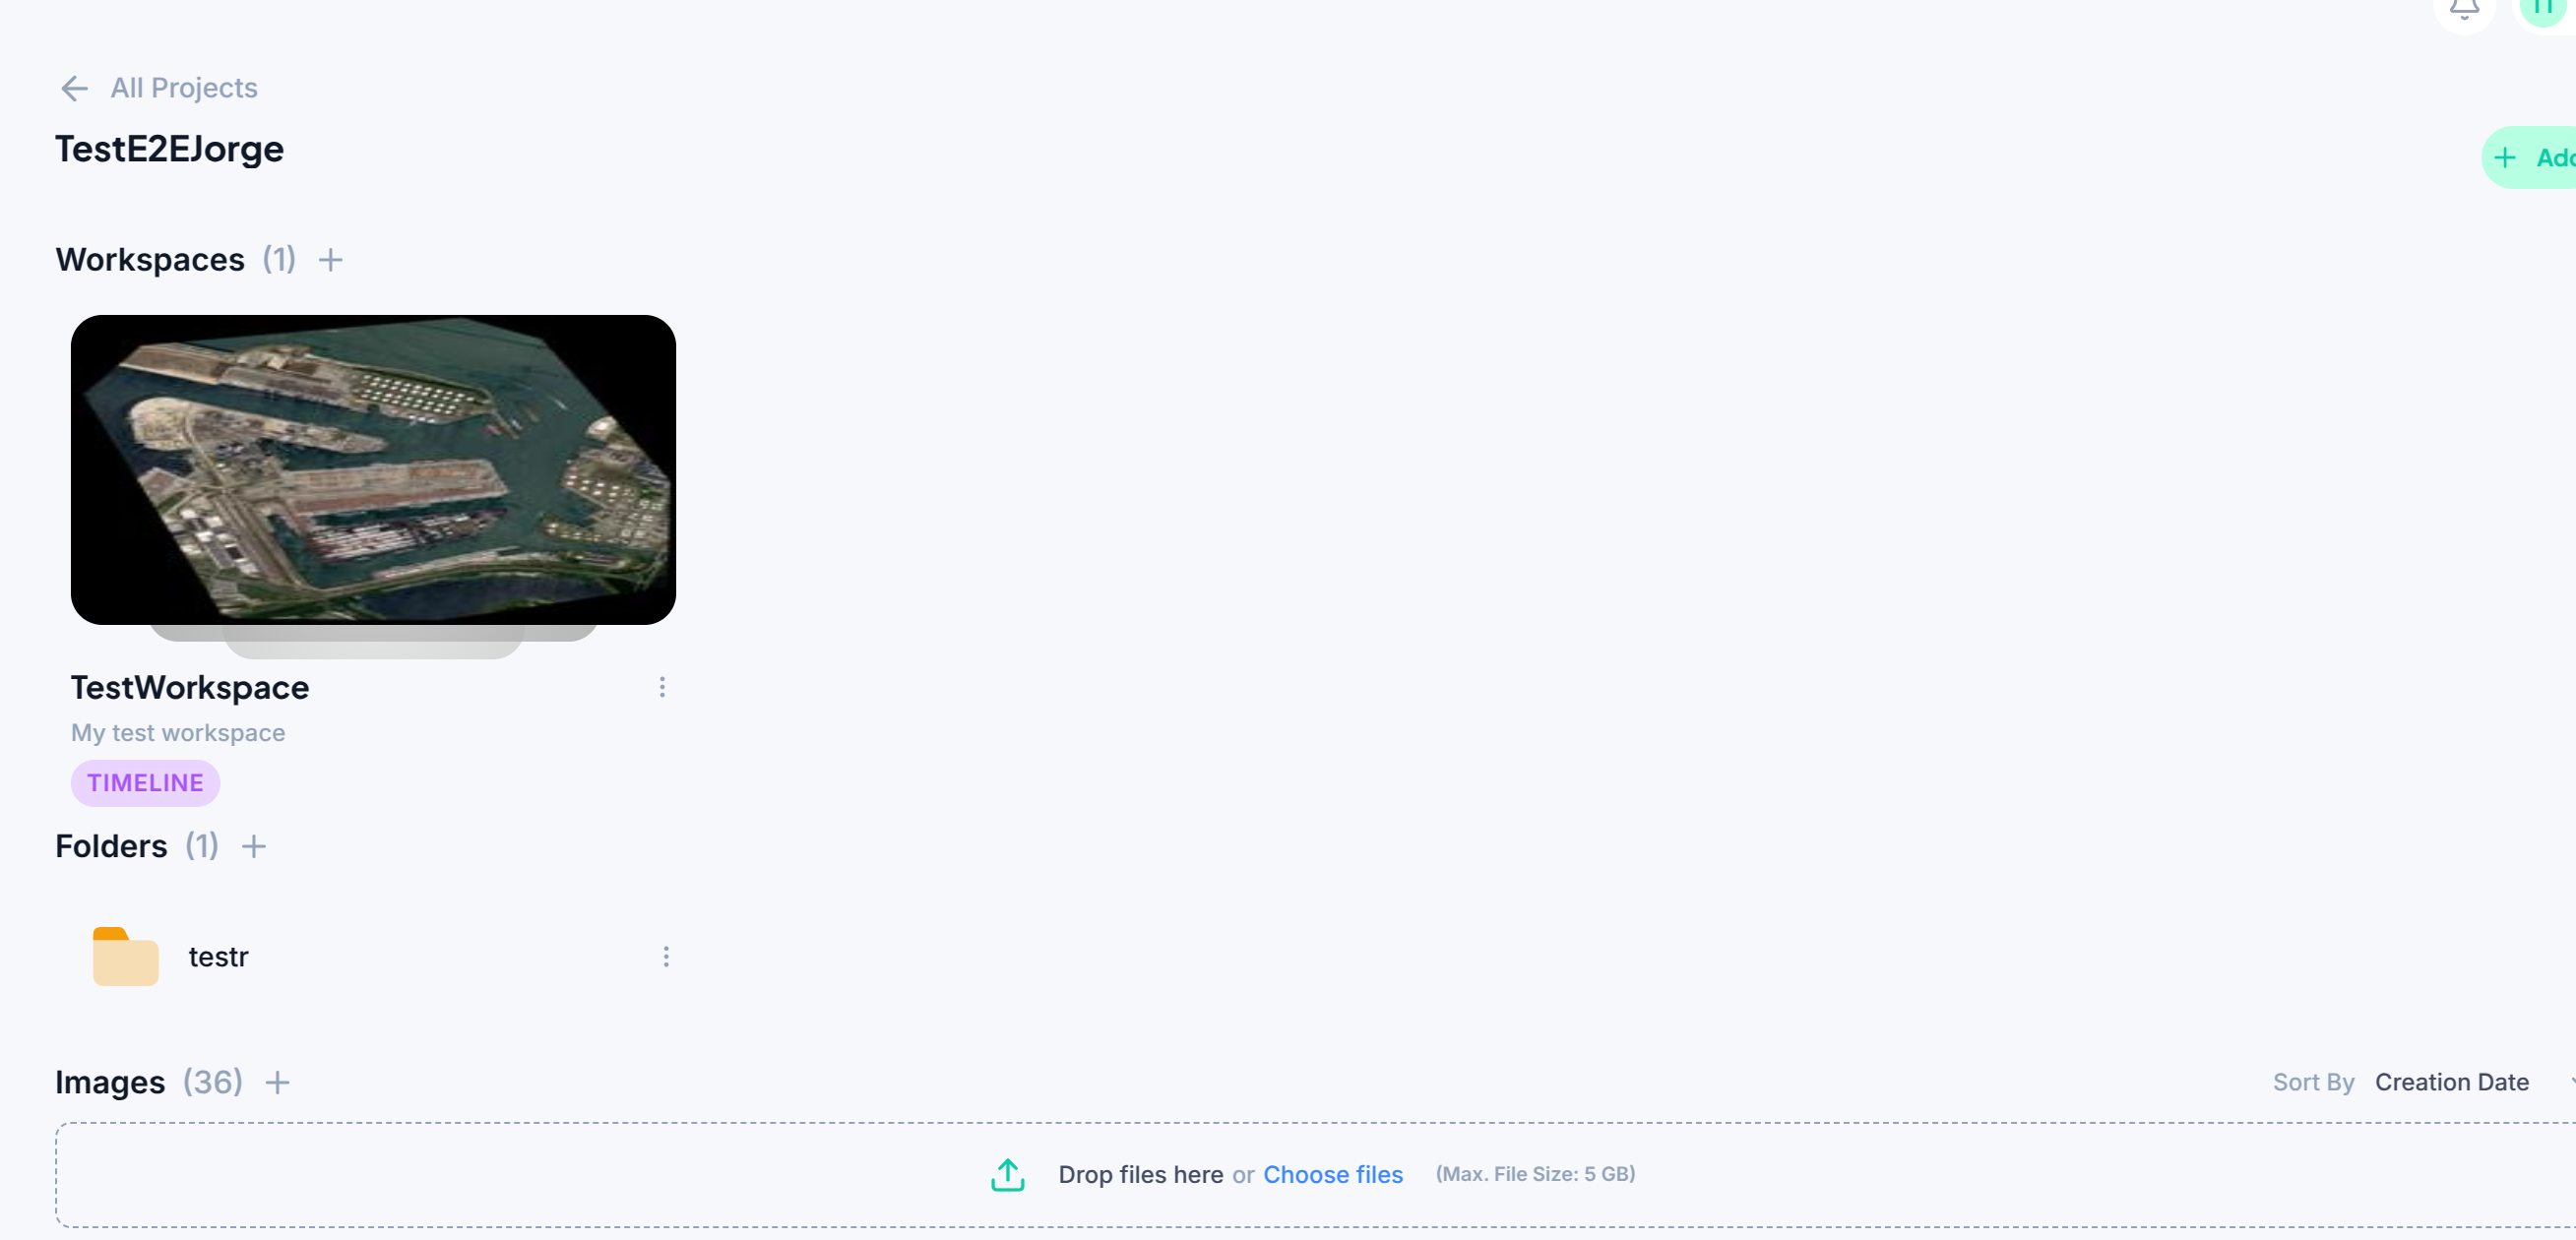
Navigate to “Projects” from the navigation bar on the top.
Click on the “Start Your Project” (1) or “+” (2) button.
Once you have your first project, you will only see the “+” button and your list of projects.
Once you have created your project, you can also change its name by interacting with the title at the top.
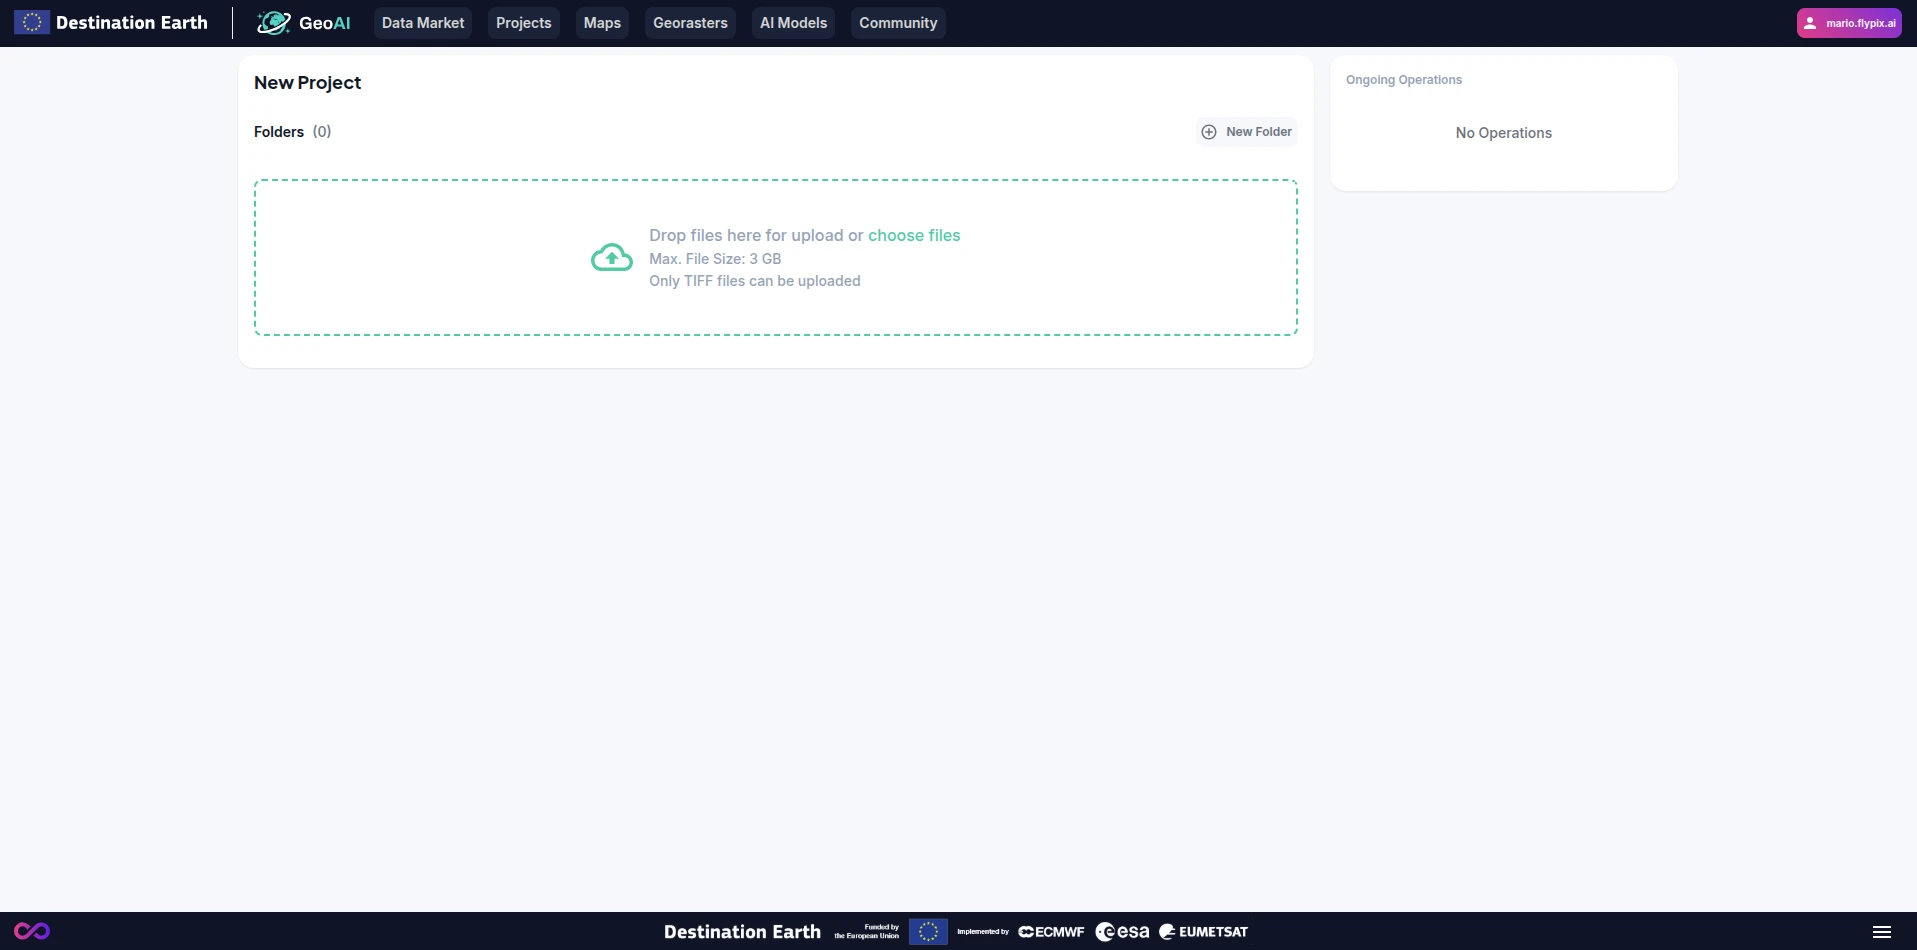
Step 2: Upload Earth Observation Data
Add Data:
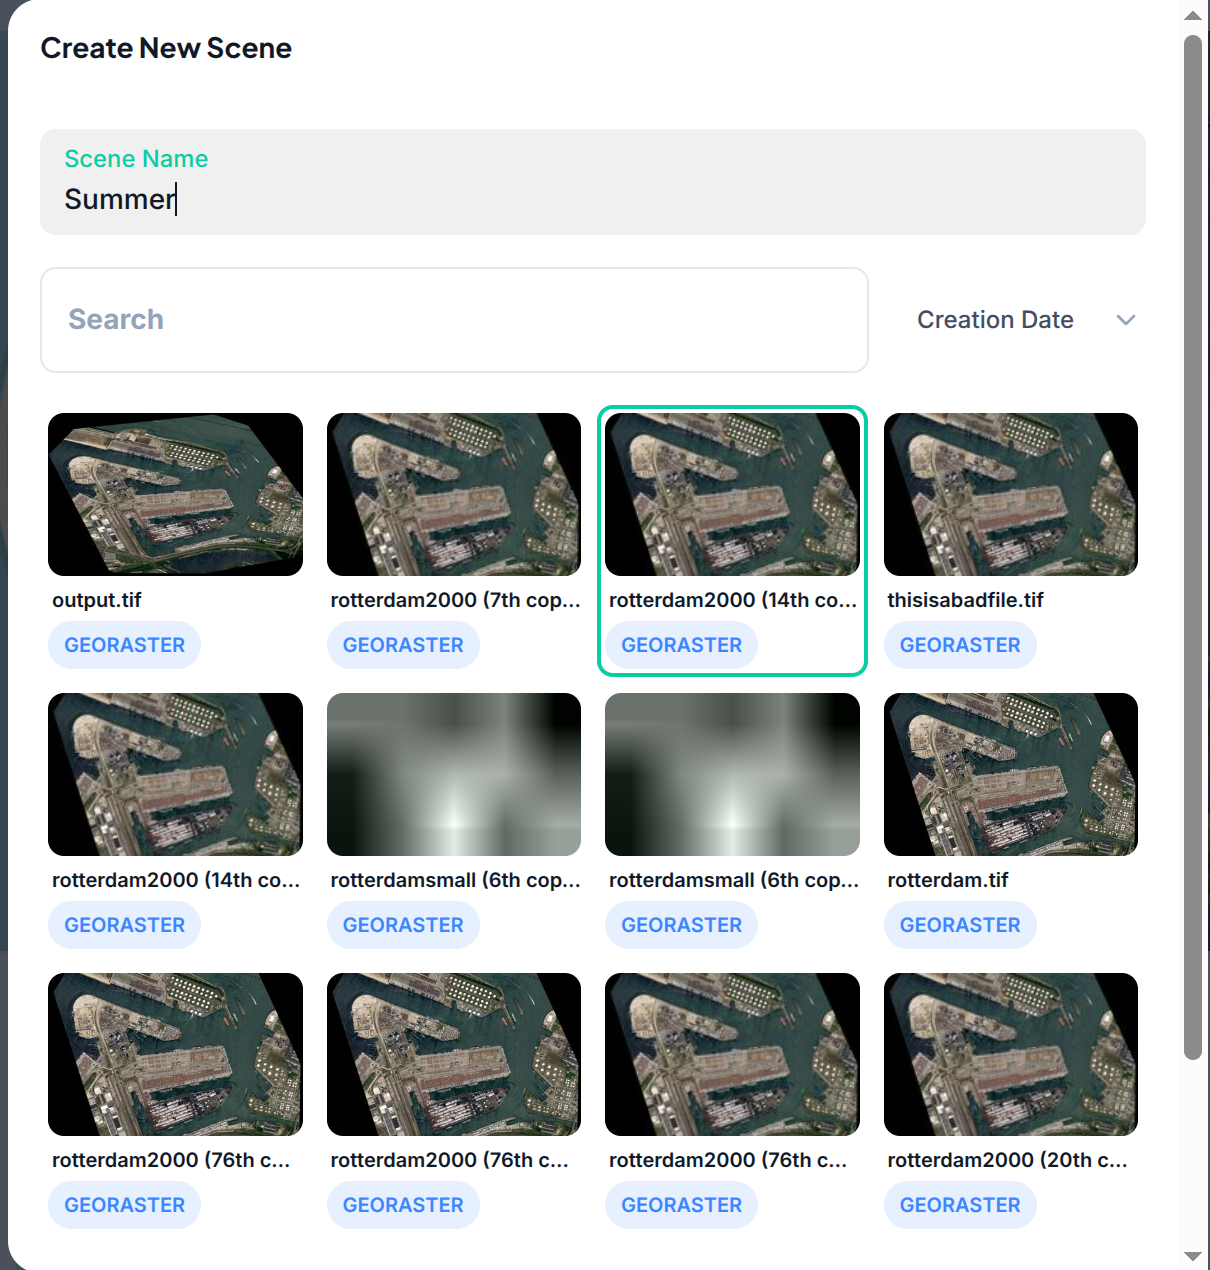
You can choose to upload your own data or acquire it through the Data Market. To upload your own raster, follow these steps:
Select the data source you want to upload. The file should be a georeferenced TIFF.
Click on the “Upload” button and select the file from your local storage or simply drag and drop the file in the selected area. Maximum file size is limited to 3 GB.
Note
The upload time may vary depending on your network speed. Once it is uploaded, it will start processing. Processing usually takes a few minutes, depending on the complexity and size of the raster.
To access the raster, simply click on the processed file in the project view.
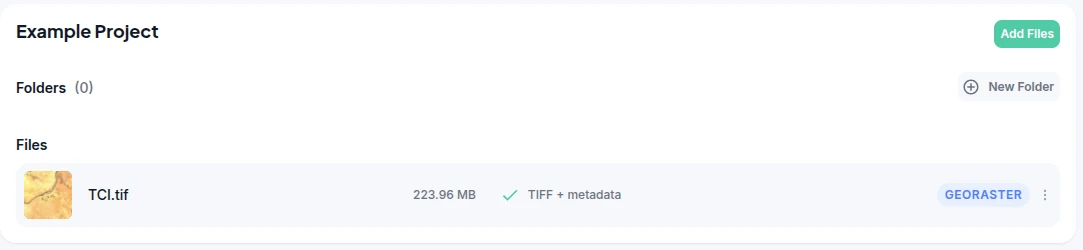
View and Interact with Raster:
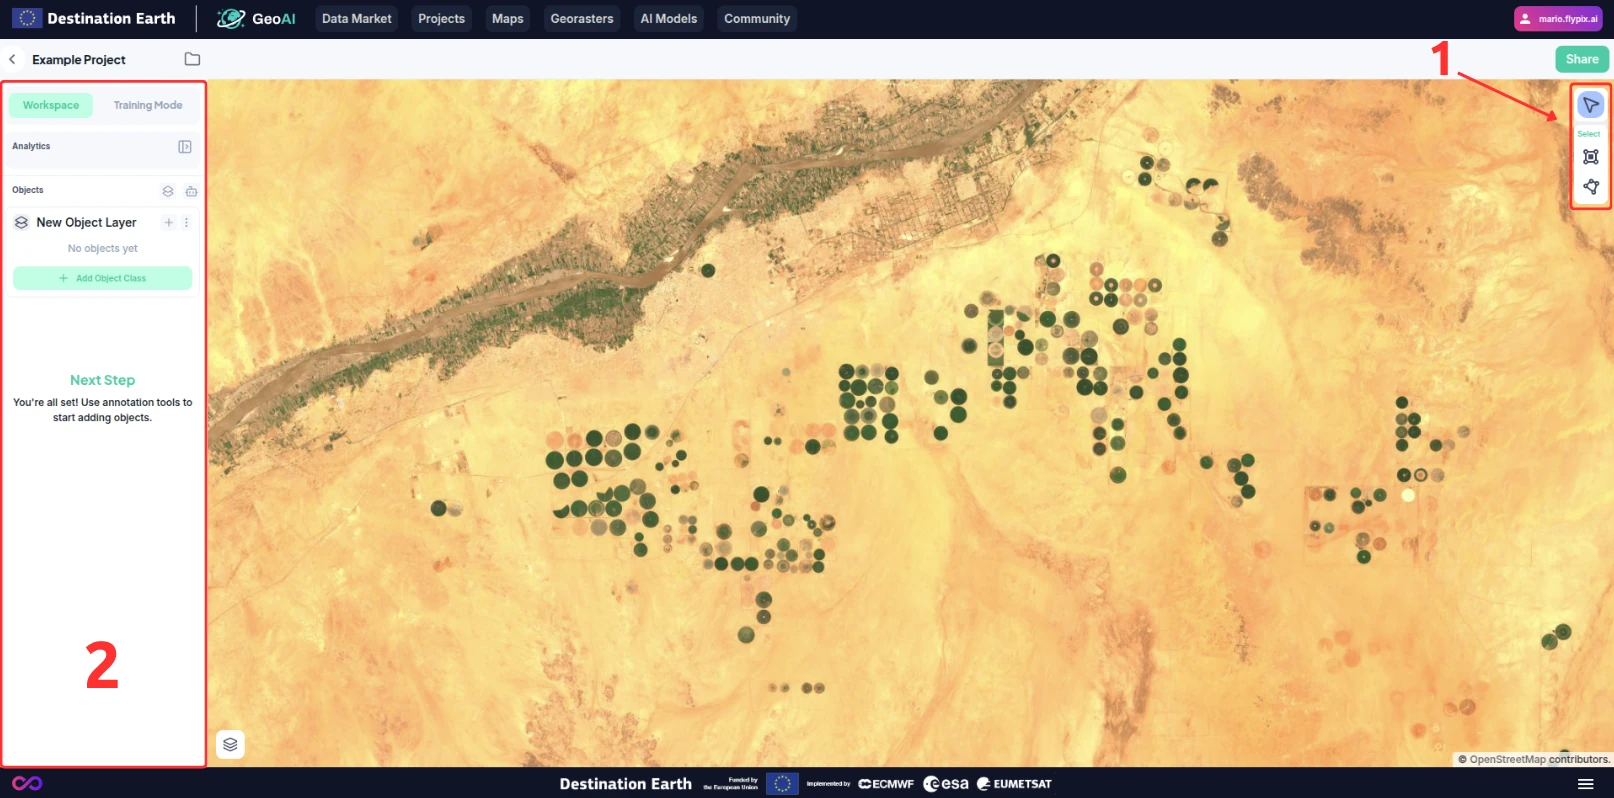
Once the raster file is uploaded and processed, you can view it using the map tools provided by GeoAI.
You can pan around the image by dragging your mouse on the viewport, and zoom in and out using the scrollwheel.
To start making annotations, select a tool from the toolbar (1).
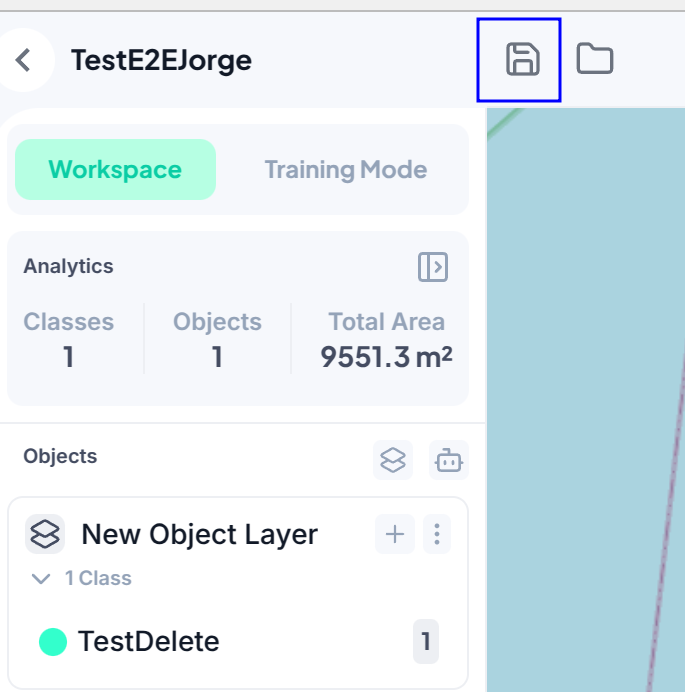
You can see and manage your layers, models, and analytics on the inspector (2).
Use and save your workspace: - You can also add multiple rasters in the same workspace, seamlessly switching between them. - Add other rasters to your opened workspace, creating scenes. You can customize the name of the scenes.
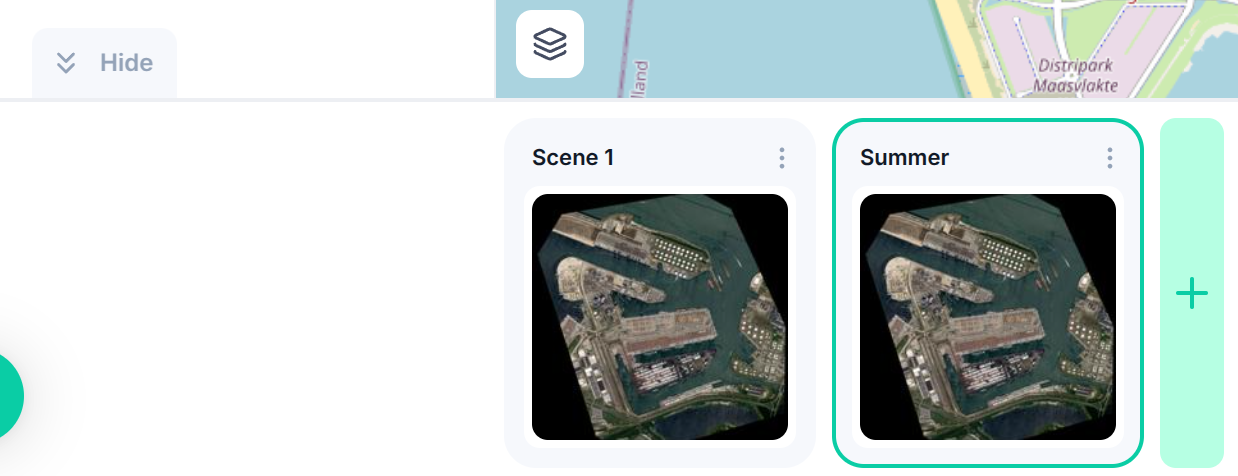
Saving the workspace will allow you to return back to your preconfigured visualization for the rasters you have selected
To access a saved workspace simply click on it from the project view.
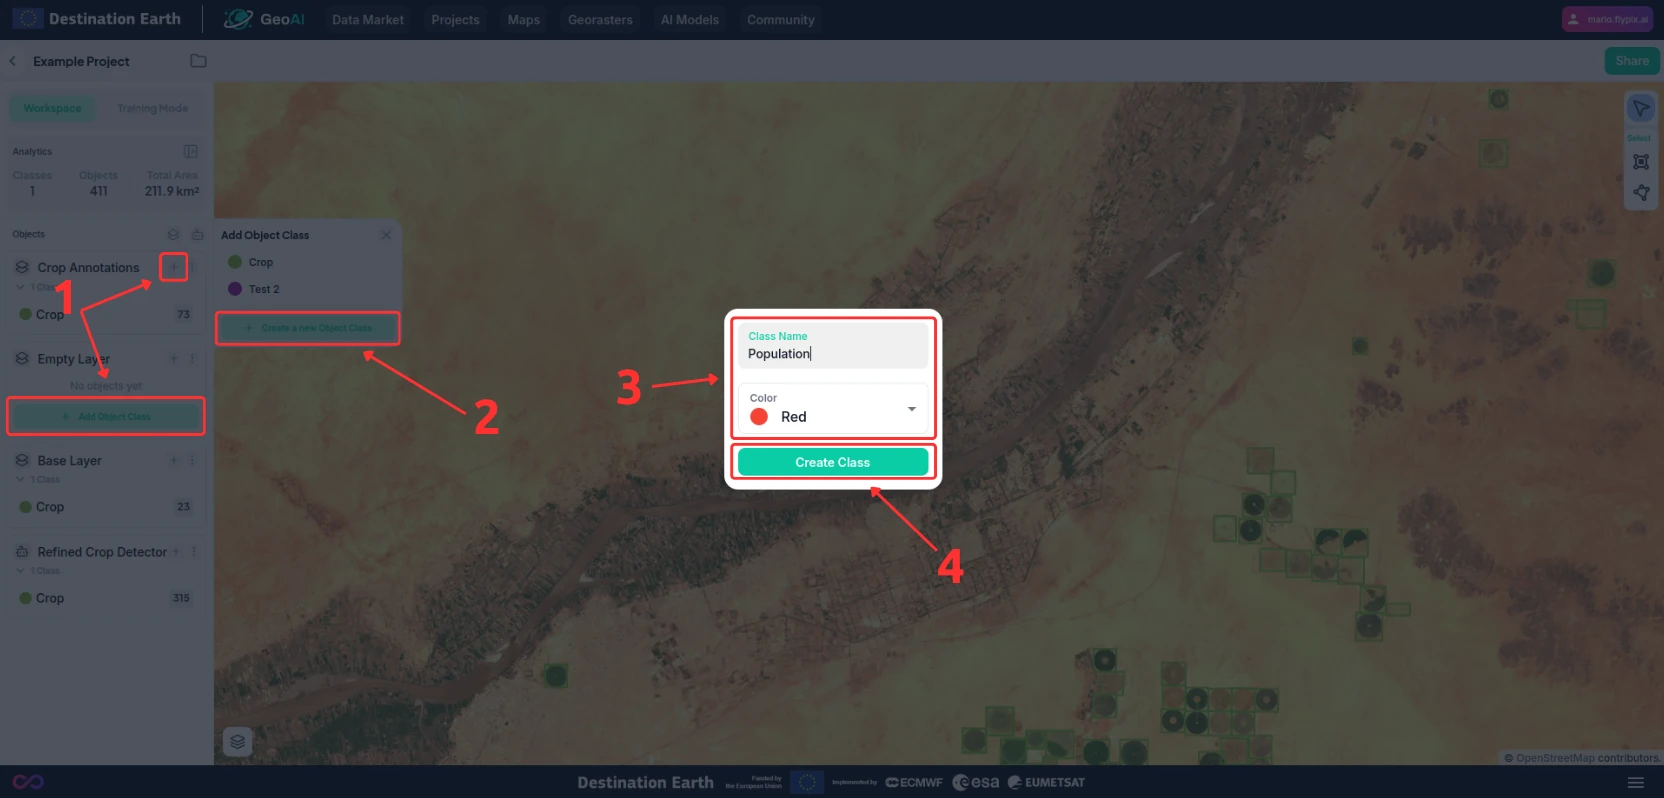
Provide Examples:
Create a new layer and register an object class onto that layer by pressing the “+” or “Add Object Class” (1) button on the layer panel and selecting “Create a new Object Class” (2).
You will be shown a dialogue where you can input the name of the object class and a color to represent it (3).
Once you are ready, press the “Create Class” button (4) to add a new object class to the layer and your project.
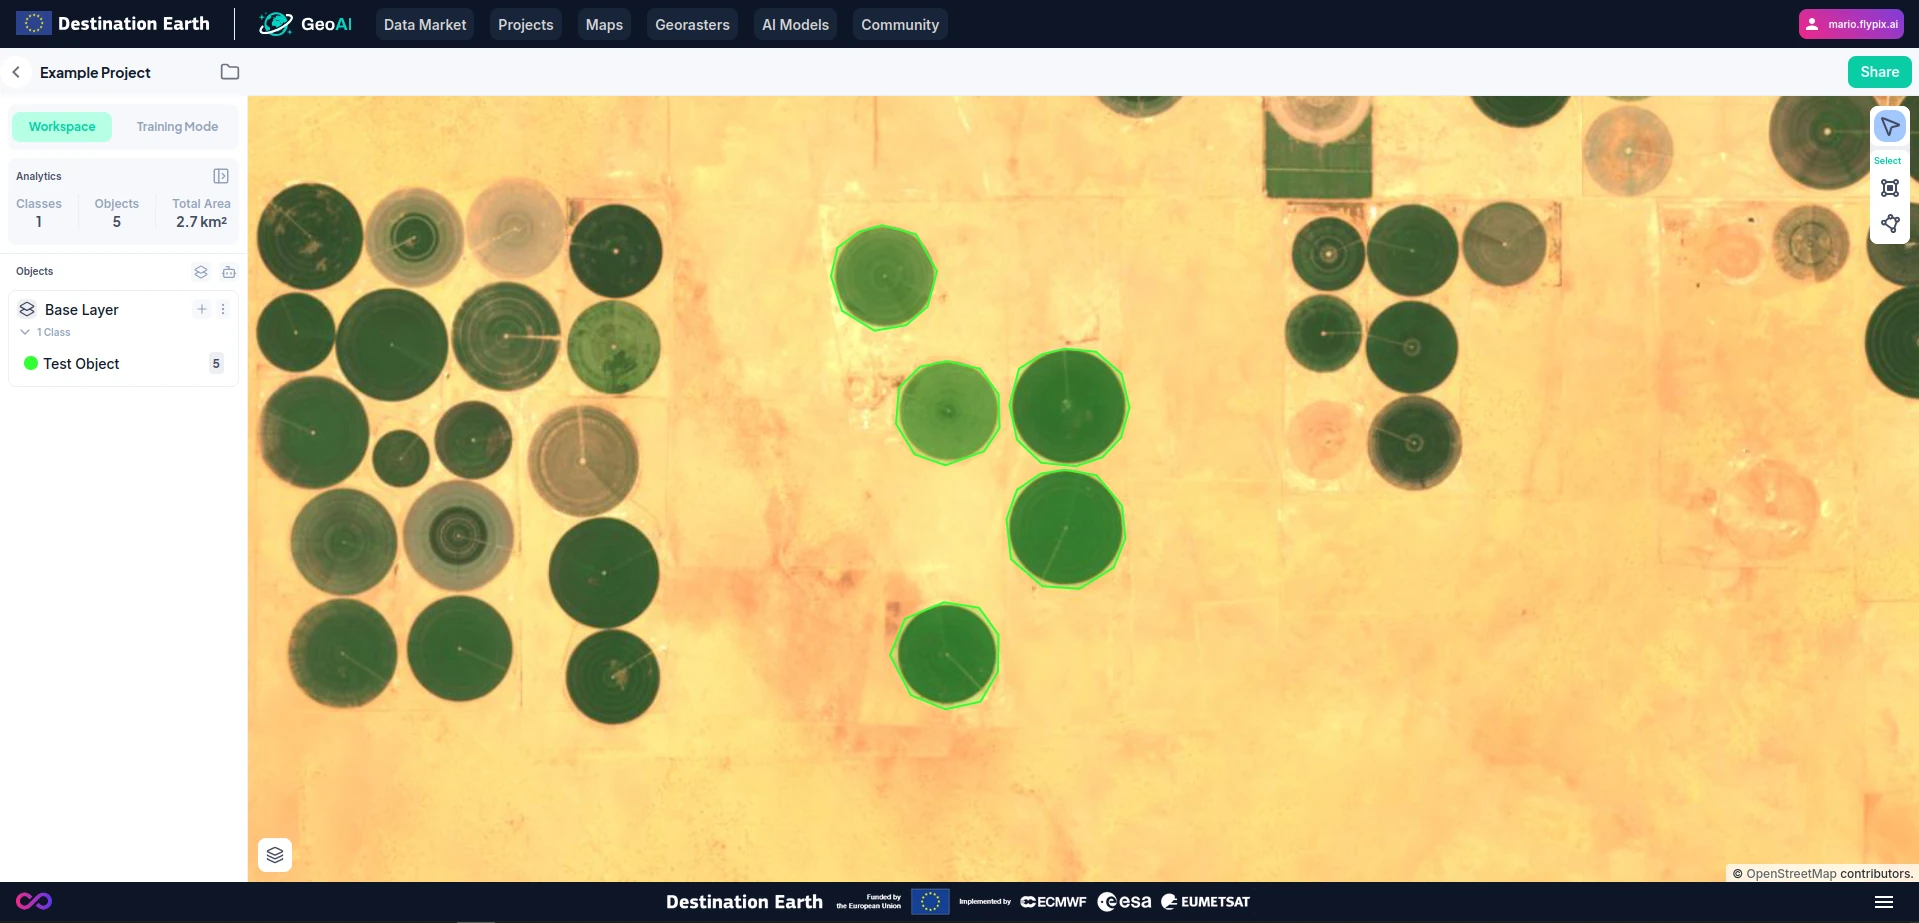
Start by creating some annotations. Use the region or polygon selection tool and start identifying the objects you are interested in.
If you don’t like some of your annotations, you can delete or edit them by right-clicking them on the viewport and selecting an action from the context menu.
Note
If you don’t manually create a layer and object class before starting, one will be automatically created for you when you start drawing regions.
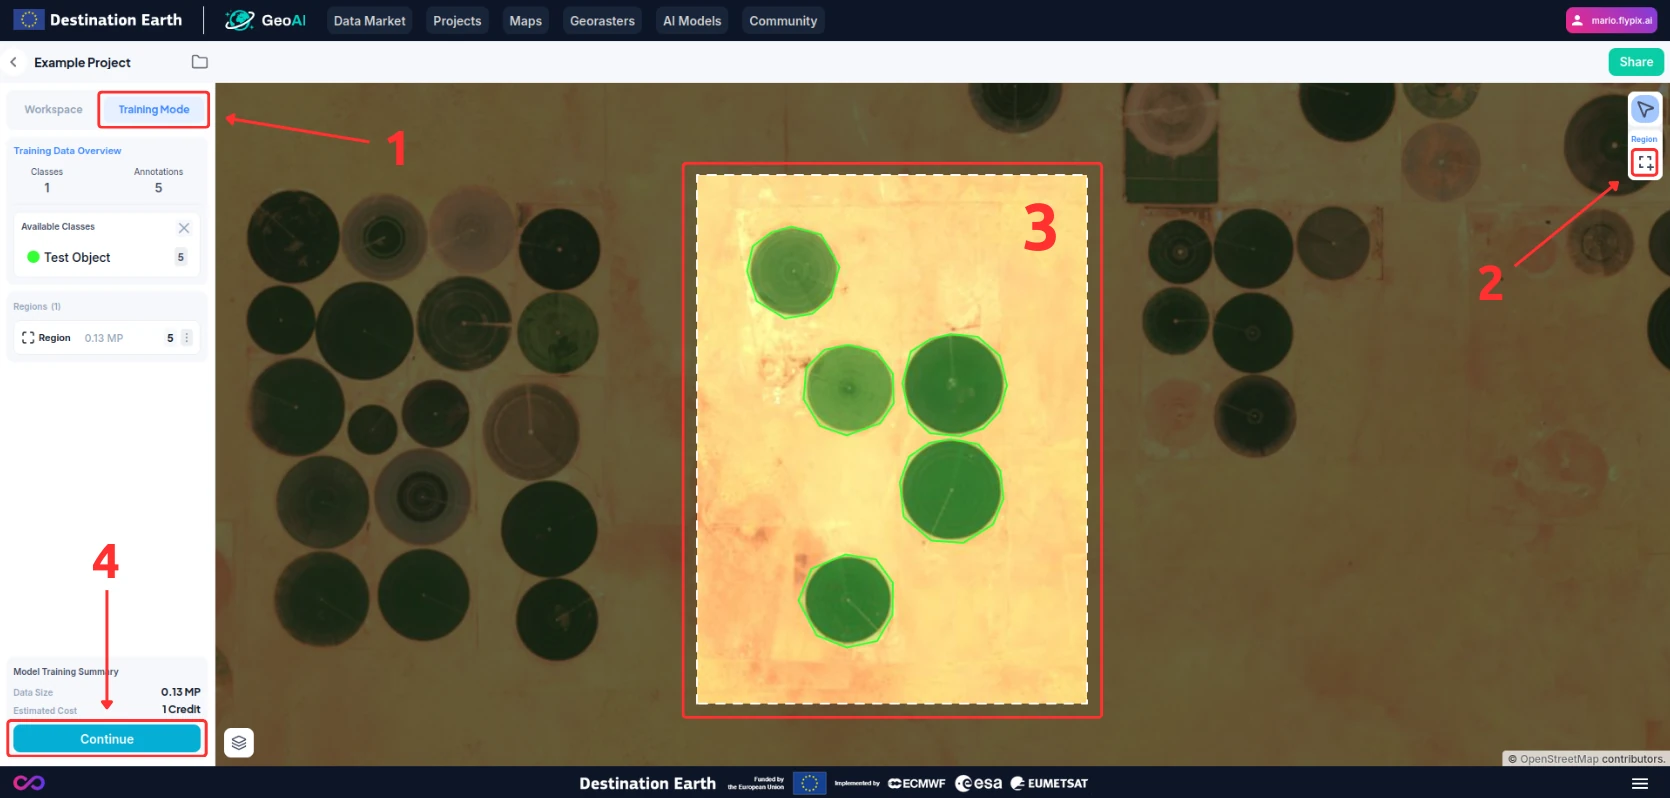
Configure and Run Model Training:
Switch to Training Mode (1), and then select the region or regions you want to use for training by using the region selection tool (2) and dragging over the target area.
At the end, you will have your selected regions for training (3).
Warning
Make sure the regions you selected are annotated thoroughly. Any missing annotations will make the model try to avoid detecting similar objects.
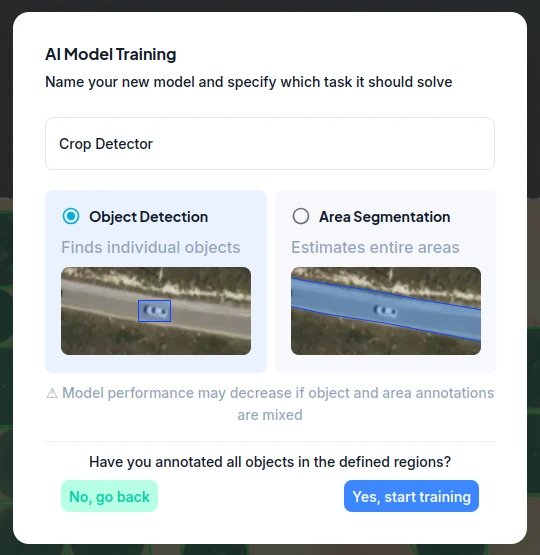
Once you are ready to proceed, press the “Continue” button (4) and select the charasteristics of the model you want to train.
Name your model and select the model type.
You can choose a detection model or a more complex segmentation model. The detection model will attempt to find the bounding box containing an object, while the segmentation model will furthermore segment the area covered by that object.
Once you are ready, confirm your settings and start the training.
GeoAI will process the data and prepare the AI model.
Note
The training time may vary depending on the size of the selected training region, the amount of annotations, and the model type.
Step 4: Apply the AI Model
Apply the Model:
Switch back to the Workspace mode in the inspector.
Press the robot icon and apply the newly created model to detect all similar objects on the raster.
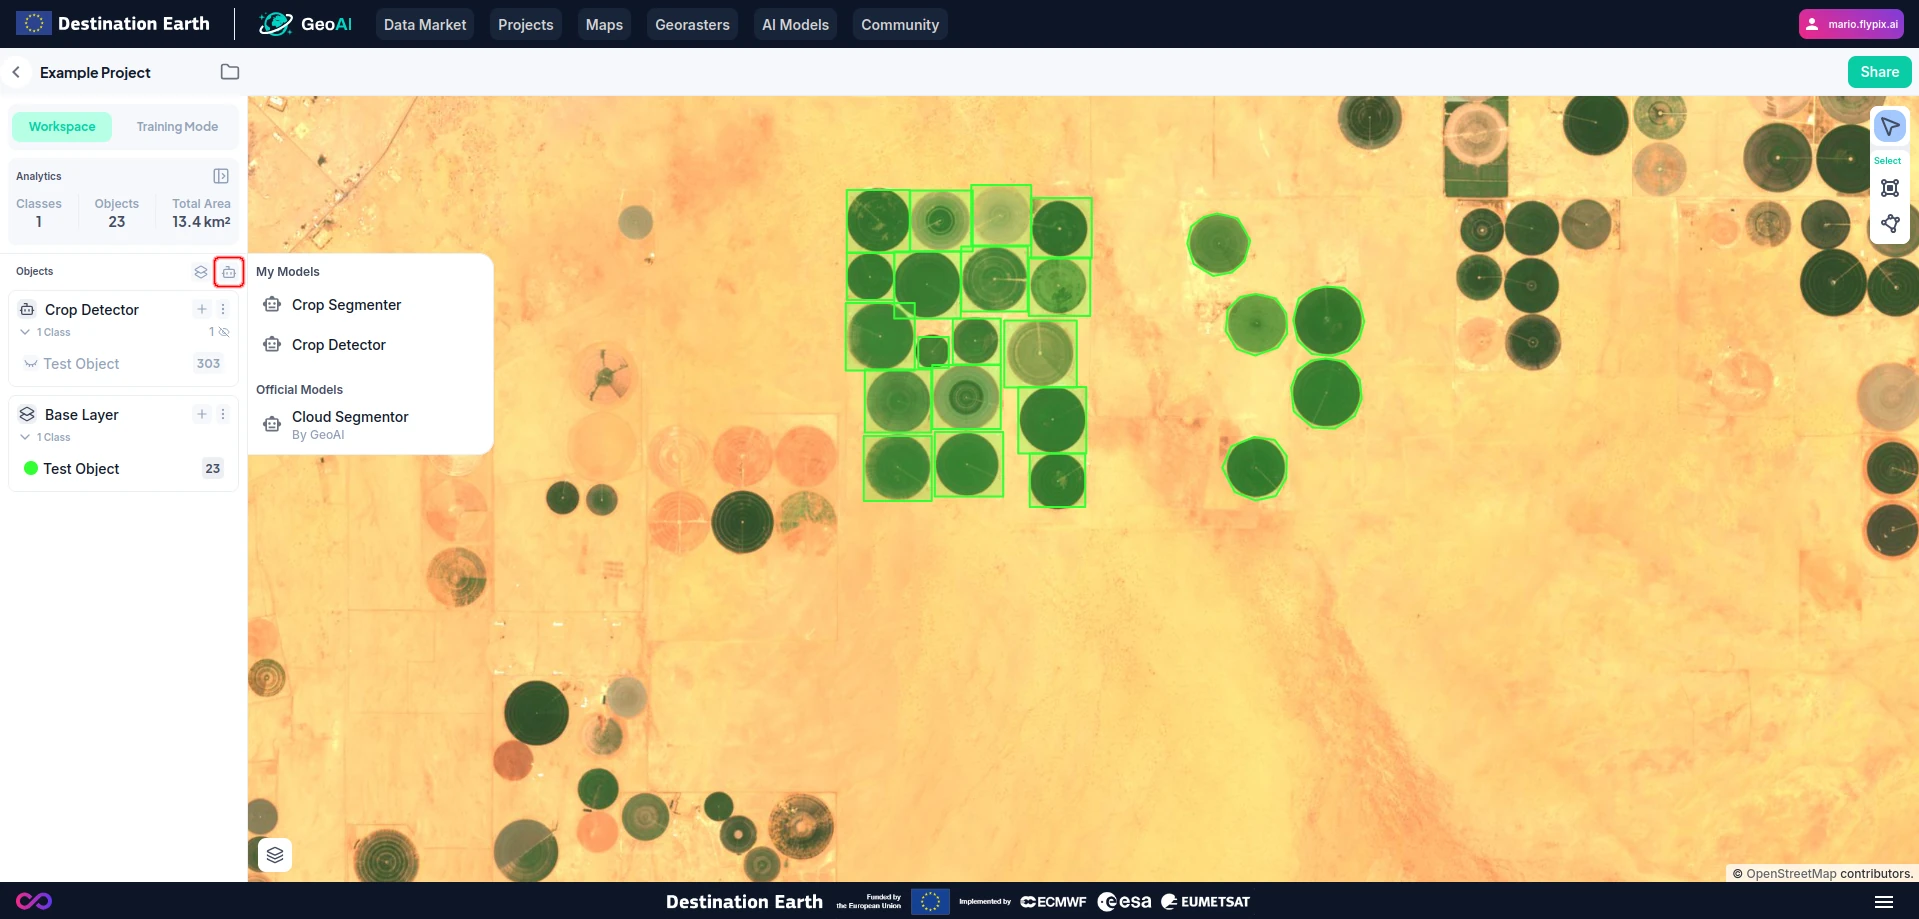
Note
The execution time may vary depending on the size of the raster.
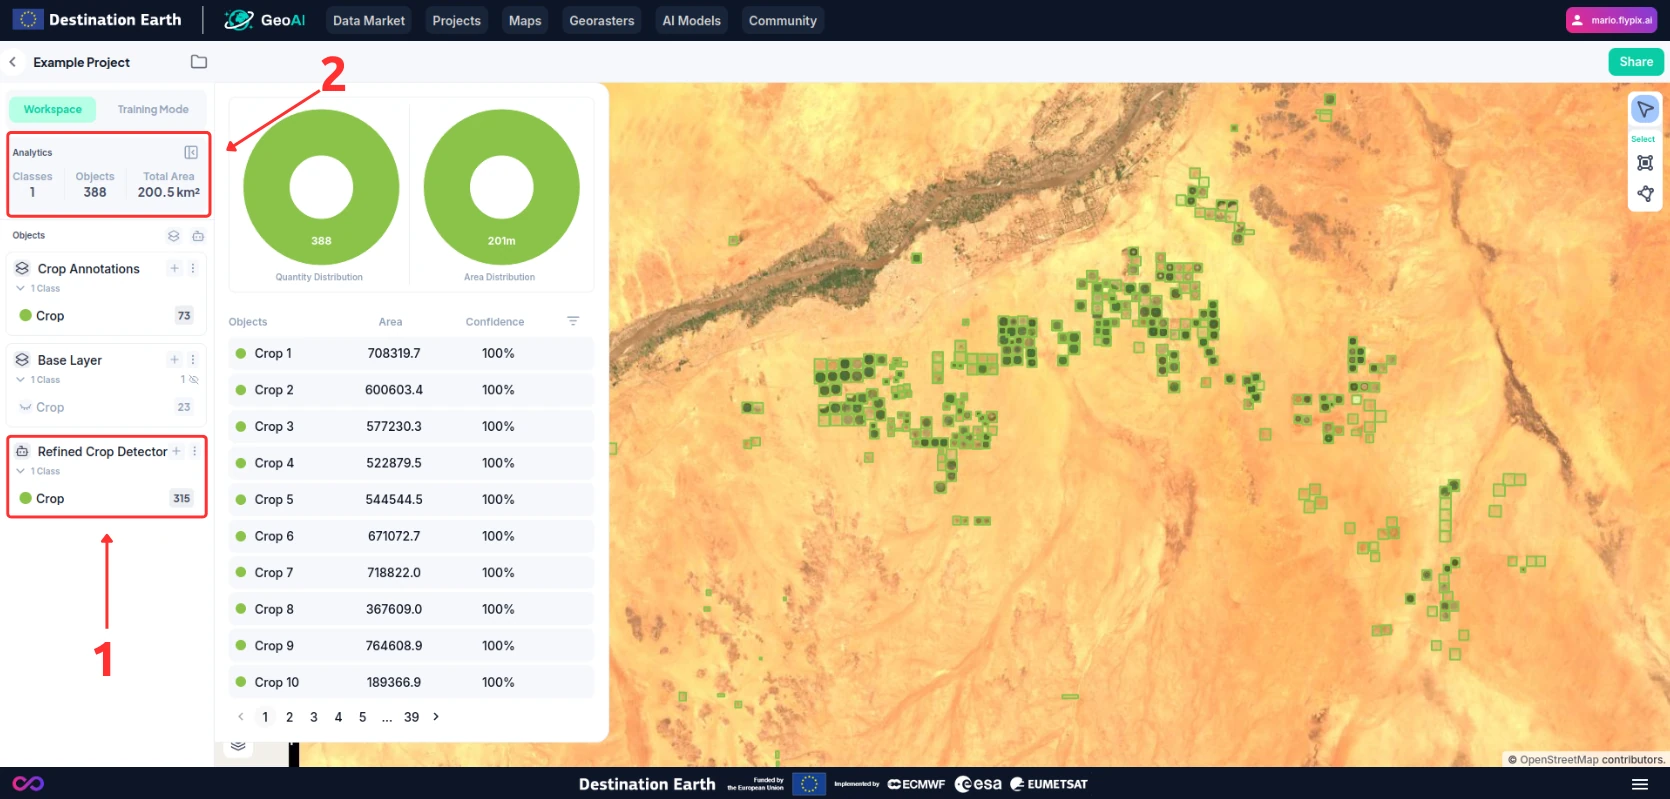
View Results:
Results will appear once the model has completed its run in a new layer (1).
Explore the detected crop fields by clicking on each mask or by reviewing aggregated statistics (2).
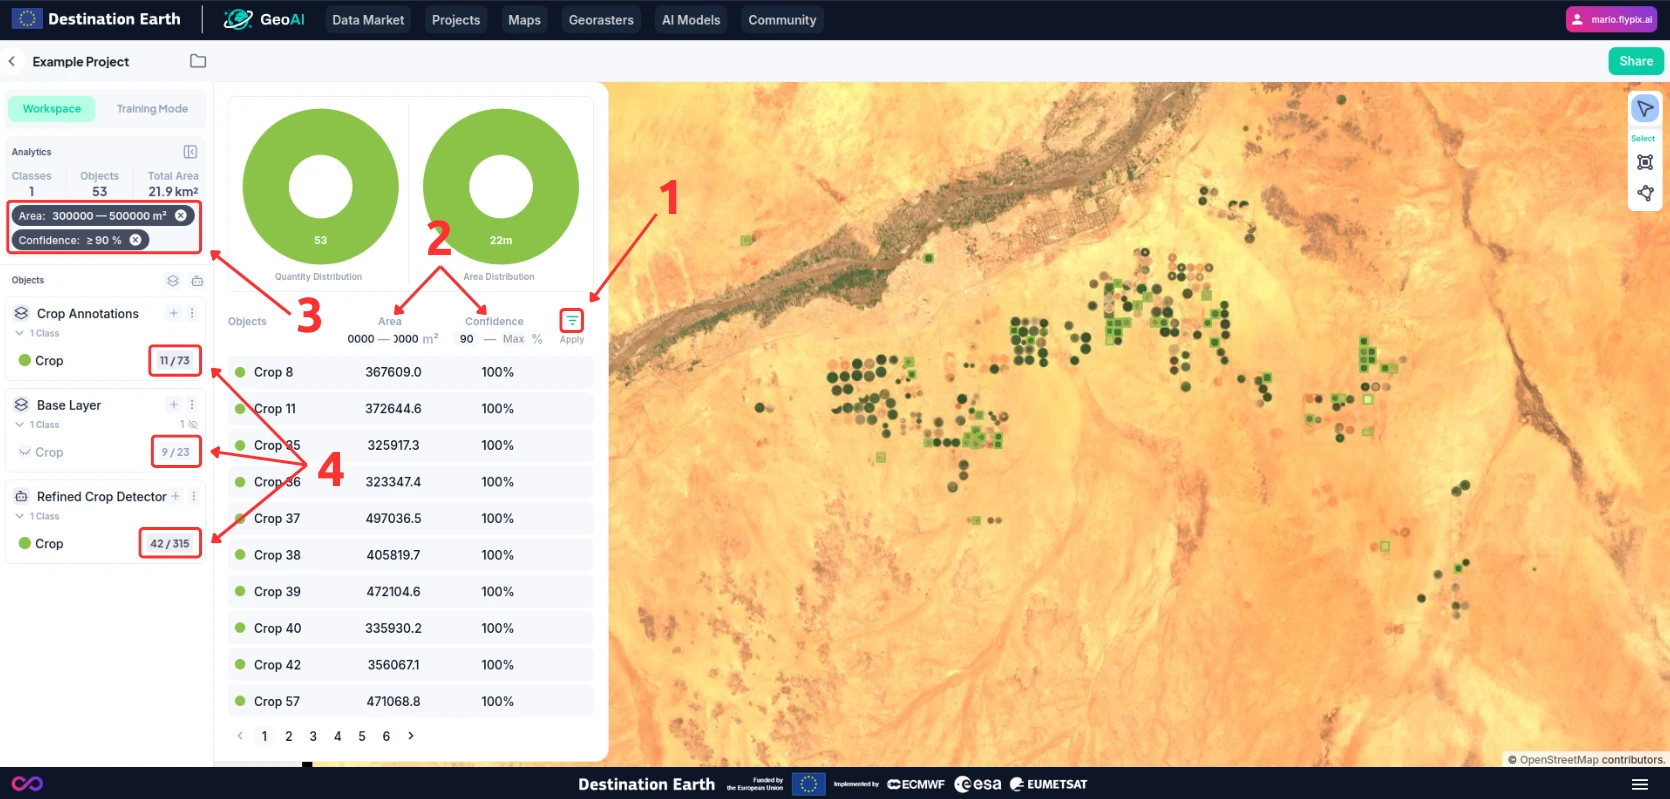
You can also filter the results by size or confidence level from the analytics panel. To do so:
Click on the “Filter” button (1).
Adjust the filter settings (2) and you will see them reflected in your analytics overview (3).
You can also see that some of the detected objects will be hidden (4) both from the layer count and the map view.
Step 5: Export or Share Results
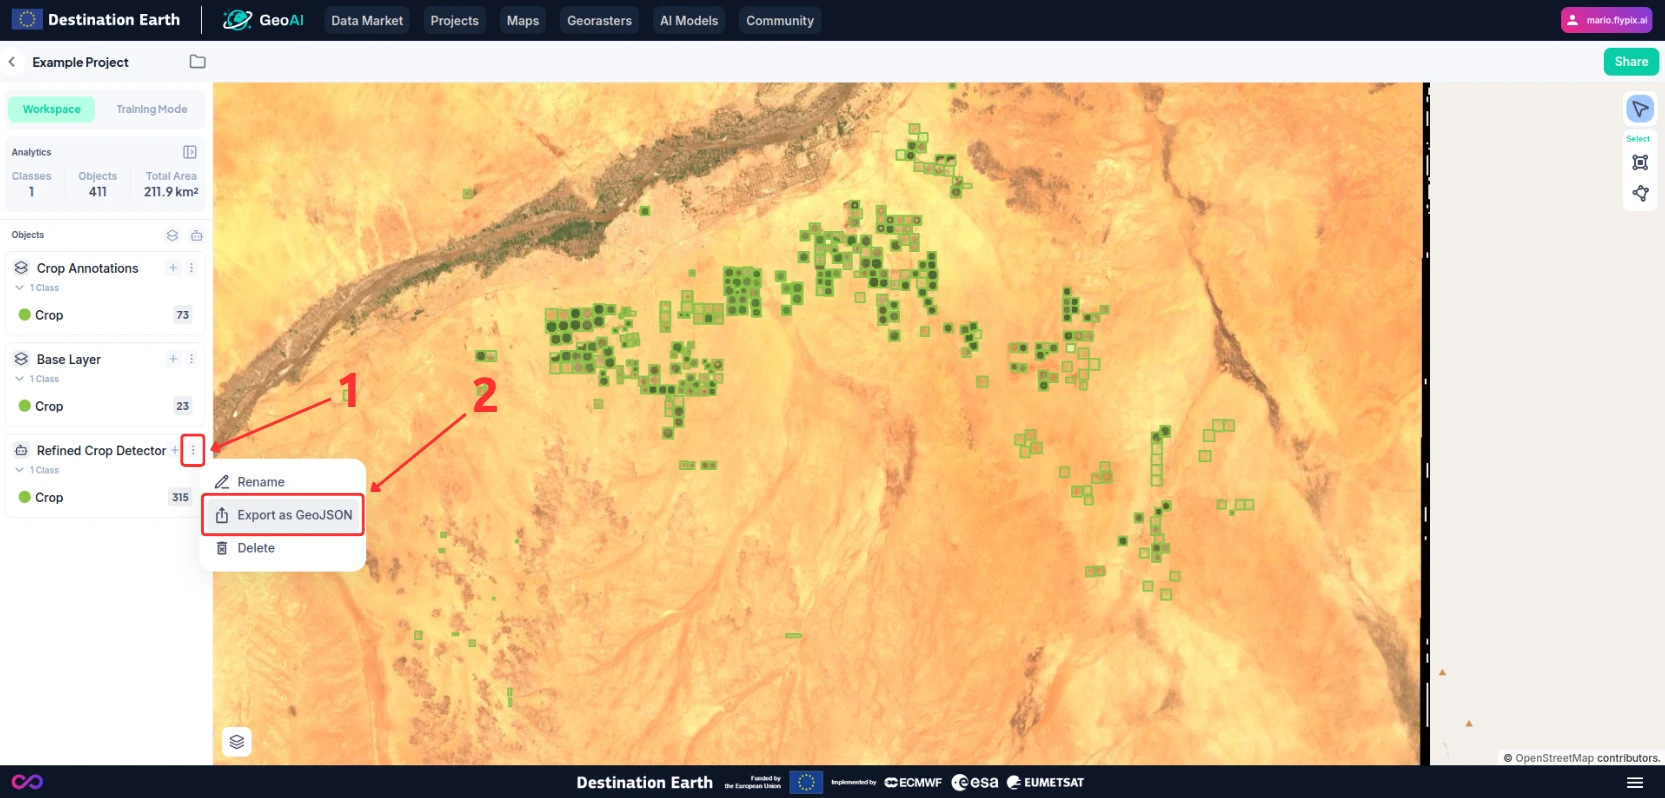
You can export the results of your analysis in GeoJSON format. To do so:
Click on the kebab menu (1) on the layer you want to export.
Select “Export as GeoJSON” (2) from the dropdown menu.
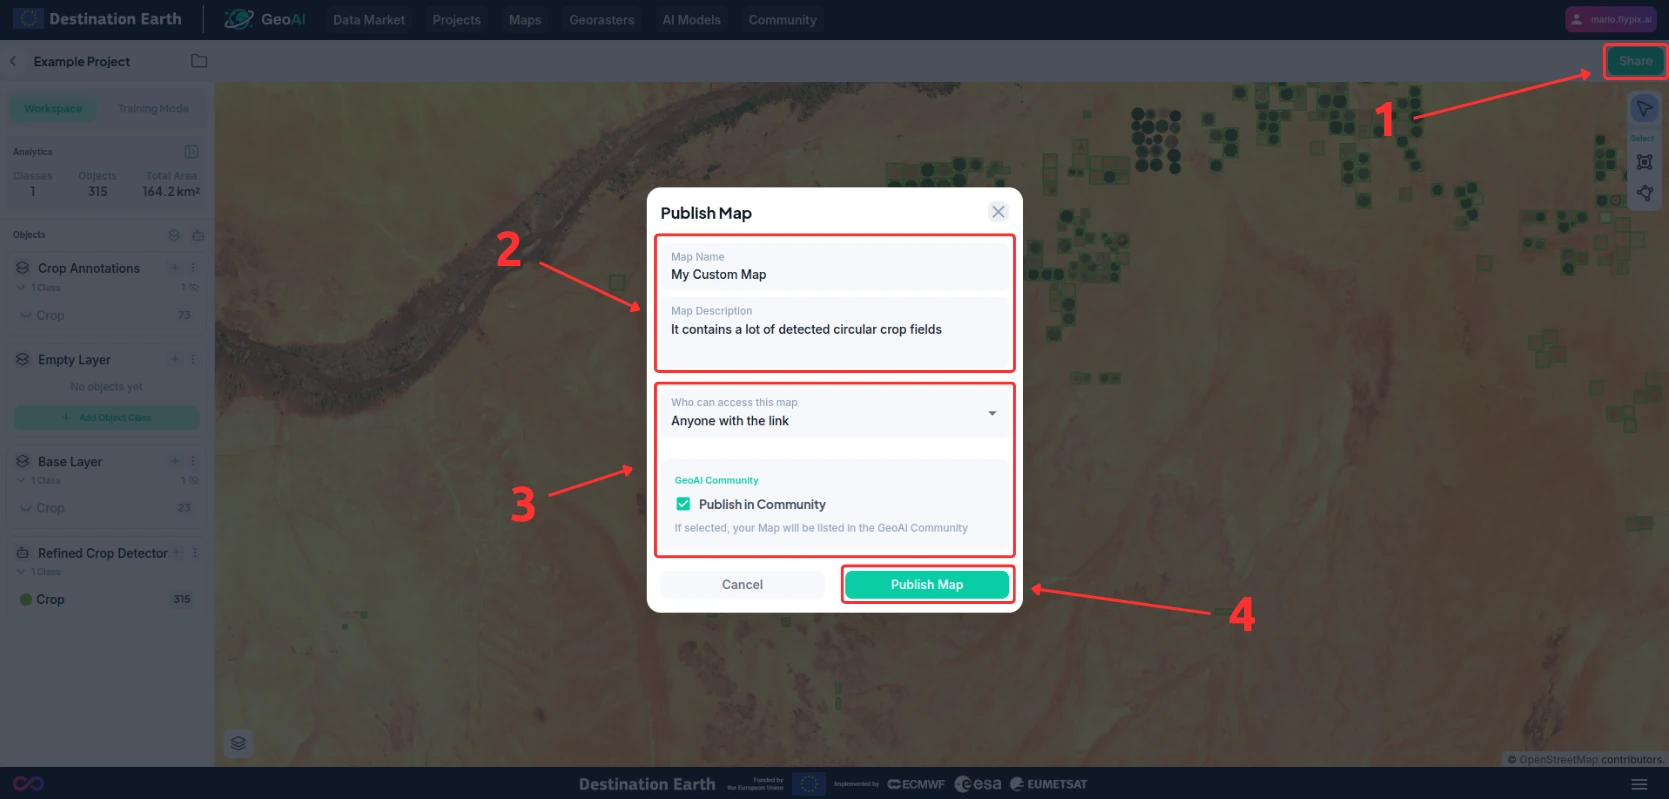
You can also publish or share the result to the public “Community” section or privately with a link. To do so:
Click on the Share button (1) on the top right of the screen.
Fill in the basic information of your map (2).
Select whether you want anyone to be able to use the sharing link and whether you want to publish to community in the sharing options (3).
Once you are ready, click on the “Publish” button (4).
Note
Since sharing with the community is inherently public, you can only select this option if you selected “Anyone with the link” in the sharing options.
Additional Capabilities
GeoAI supports a wide range of applications:
Detect and localize any kind of objects like vessels.
Identify structures like stadiums and oil tanks.
Classify land utilization on large territories.
Explore the numerous features GeoAI offers and stay updated with new functionalities added regularly.
Conclusion
This user guide provides a simple workflow for using GeoAI to analyze satellite images and generate insightful data. For more advanced features and detailed instructions, explore the GeoAI help resources and tutorials available on the platform.