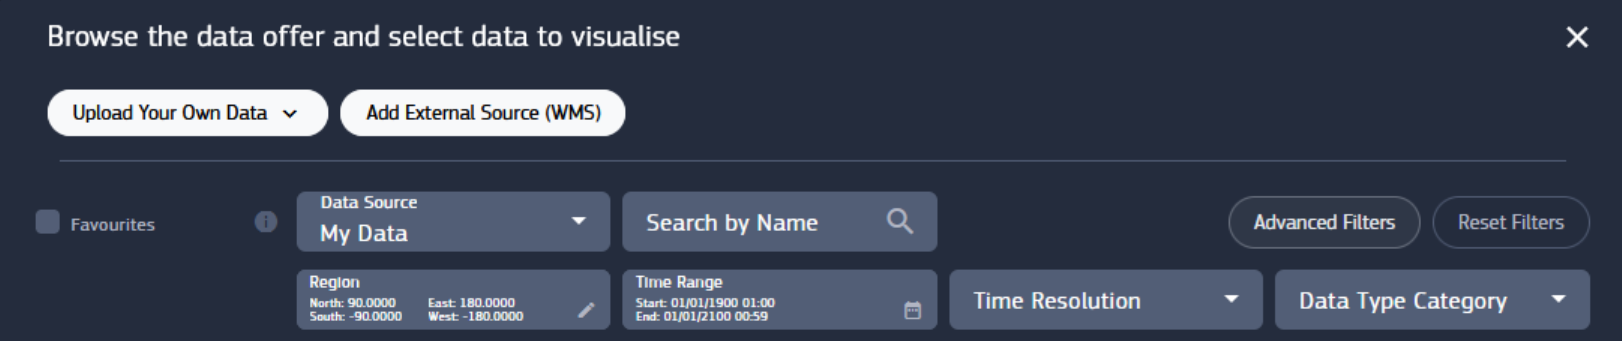
6. Upload Your Own Data
6.1. Upload Video, Image, Tiff for GRD/IMG Layer
Data Offer provides an alternative way to create datacubes by selecting Upload your own data, which spawns a window to upload data from the local device. It’s possible to upload single images and videos, or multiple images, along with the parameters :
Start time
Temporal Resolution
Sample Duration
Region Coordinates
Datacube name
Projection (WGS84 or Mercator)
- Supported formats :
Image : JPG, PNG, TIFF
Video : MP4, WebM
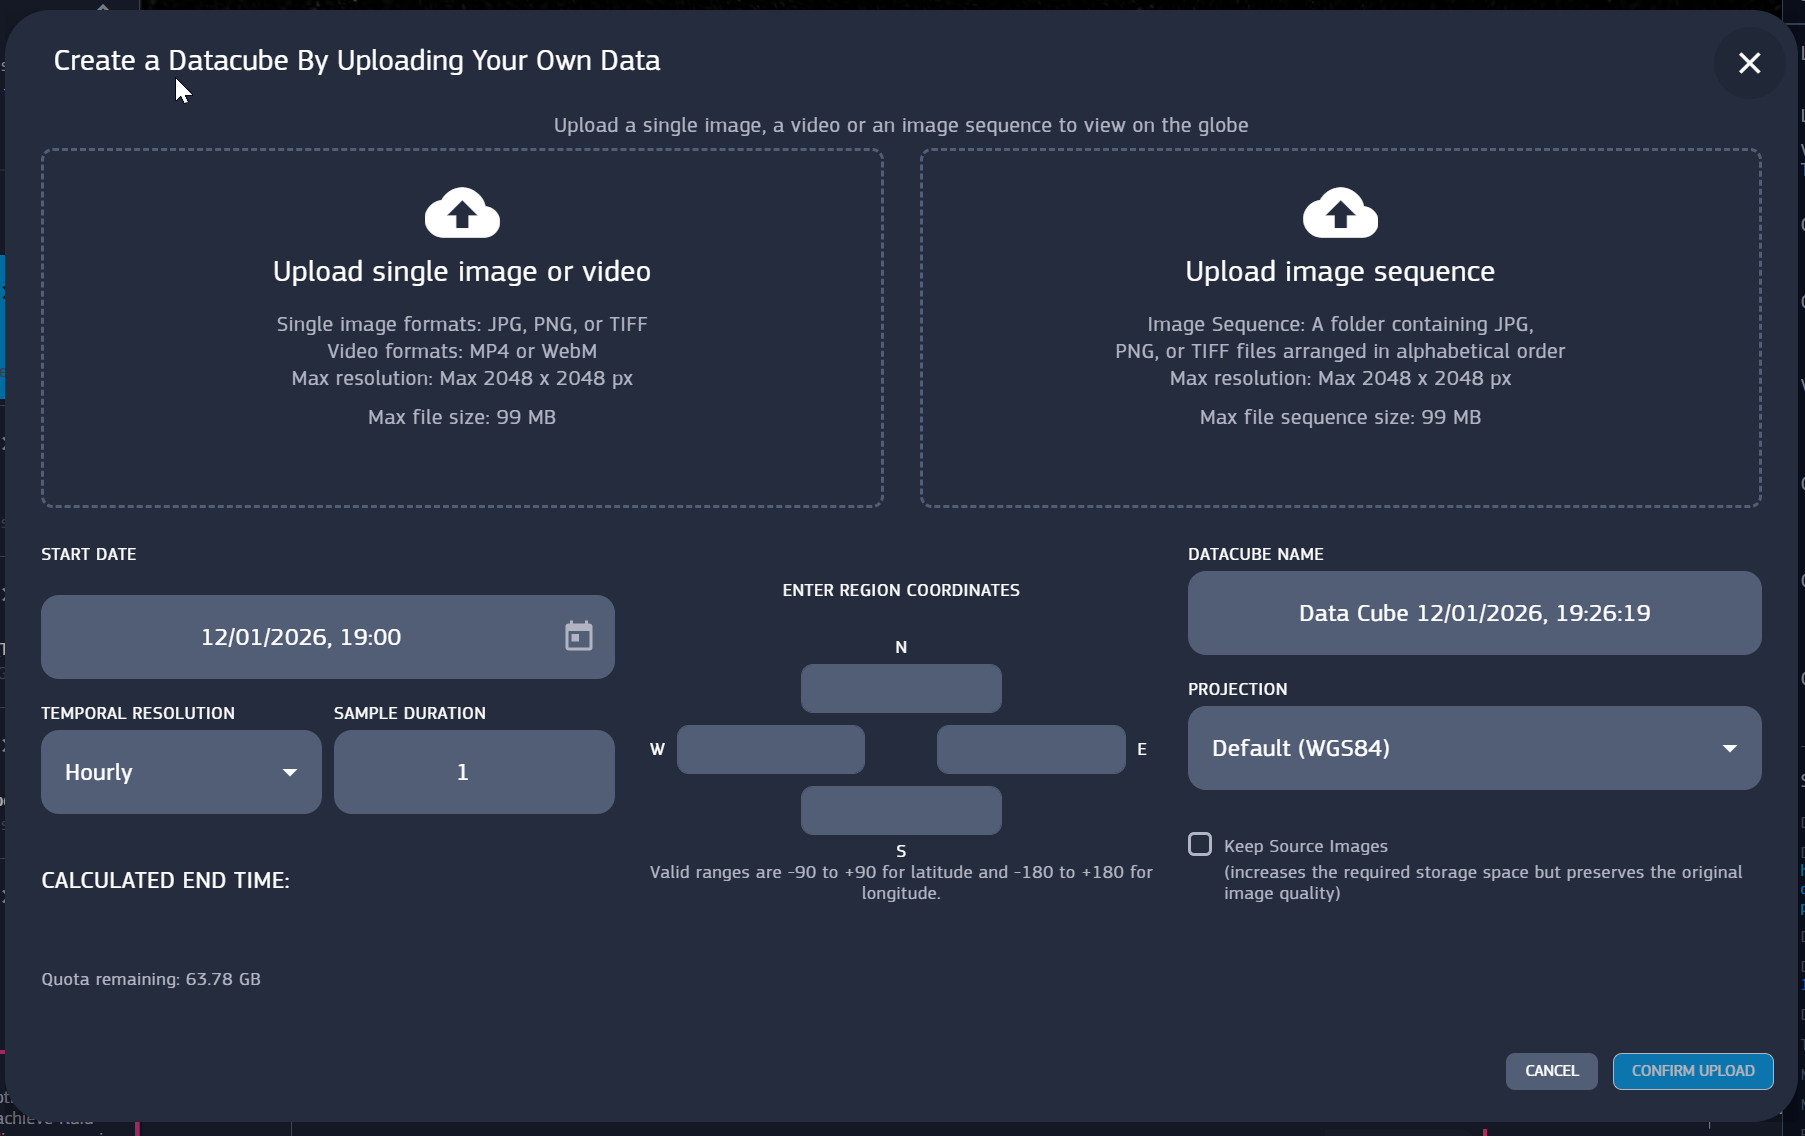
Fig. 6.1 Upload data panel
It’s worth to make a distinction between data cubes and users own data. While data cubes are public and can be used by anyone, no matter who created them, user data are private by default. The only way to make them visible is to publish a story containing them in edit mode. In that case, anyone can save a copy of the story on their account, which implies saving a copy of the data involved in the story as well. (You cannot have a saved story in your storage without having saved the related data).
6.2. Upload CSV File for VAL Layer
To create a Measurement/Value (VAL) layer, you can upload a CSV file from your local device. The maximum allowed file size is 30 MB.
The uploaded CSV file must contain the following columns to be parsed correctly :
TIMESTAMP
LON.
LAT.
VALUE
Along with the file upload, you can configure the following parameters :
SKIP LINES: Number of lines to skip at the beginning of the CSV file (useful for skipping headers).
NAME: The name for your VAL layer.
DESCRIPTION: An optional text description of the measurement.
UNITS: The unit of measurement for the values.
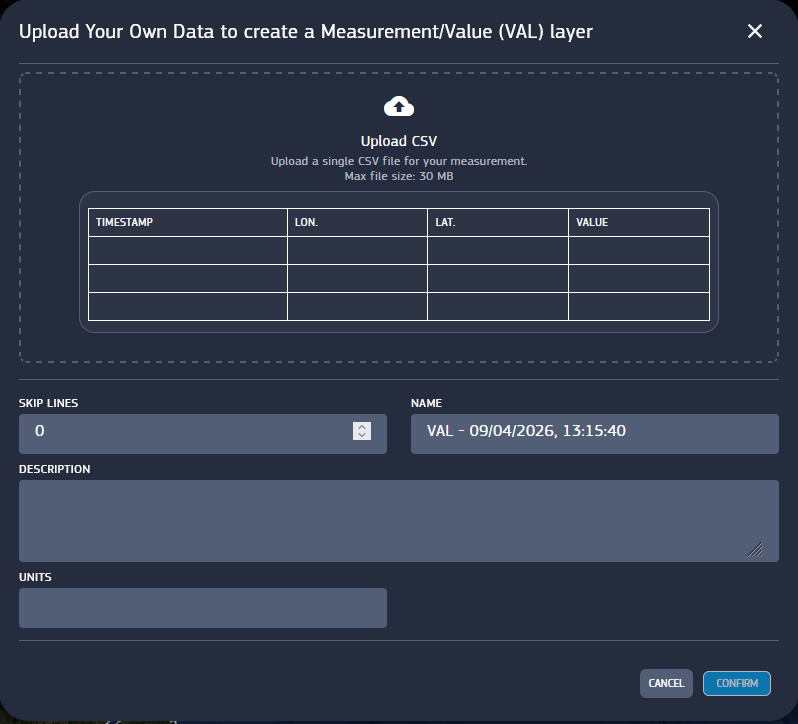
Fig. 6.2 Upload data VAL panel
6.3. Upload CSV File for SEC Layer
Similarly, to create a Measurement/Section (SEC) layer, you can upload a single CSV file with a maximum size of 30 MB.
The CSV structure required for a SEC layer contains more parameters to define the section’s geometry and must include the following columns:
TIMESTAMP
LonStart
LatStart
LonEnd
LatEnd
AltBot
AltTop
Value
The configurable parameters are identical to the VAL layer:
NAME
DESCRIPTION
UNITS
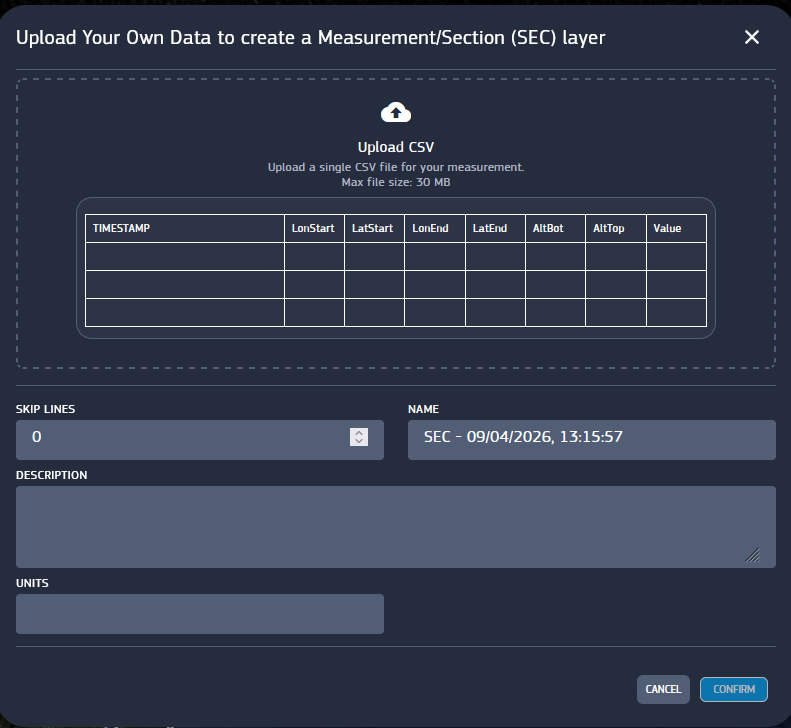
Fig. 6.3 Upload data SEC panel
6.4. Visualize MyData as Layer
To visualize the data you uploaded at a later time, simply add the filter datasource > My Data.
At that point, you can add your previously uploaded data as a layer.